SIMPLICITY
•
CONSISTENCY
•
FUNCTIONALITY
•
MODULARITY
•
SIMPLICITY • CONSISTENCY • FUNCTIONALITY • MODULARITY •
Portfolio
Ch. 01: Hi, I’m Aidan
I am a creator/designer with a background in metalworking, woodworking, and 3D printing. Until recently I was a professional software engineer but decided to redirect my professional career towards something I am very passionate about, the development of innovative and functional hard goods. Throughout my time working with physical mediums and in the tech space I have developed an inherent and natural understanding of product design. Working for my father’s steel company and then a luxury furniture shop throughout my young adult life brought forth an in depth material knowledge as well as a product standard that demands a quality feel and appearance while also stressing safety, reliability, and functionality. My time as a software Engineer started in 2020 and gave me the chance to learn and help shape user experiences on mobile platforms. This includes making complex software systems digestible, friendly, and intuitive. Along with user facing designs my time working for large corporations like iHeartMedia has taught me a great deal about tight deadlines, working with large teams to meet those deadlines, agile methodologies, and the importance of having a system for tasks in place. Contrastingly, my time spent at tech start ups has taught me a great deal about wearing many hats and working independently. I hope you’ll enjoy the projects posted below and thank you for your time reviewing my portfolio.
Ch. 02: From Scratch
The following projects are my flagship pieces. I designed each with a specific goal in mind completely from scratch. They all went from drawn sketches to 3D models to real life objects. They involved quite a bit of research and multiple prototypes. I feel they are good examples to show off my product engineering skills holistically.
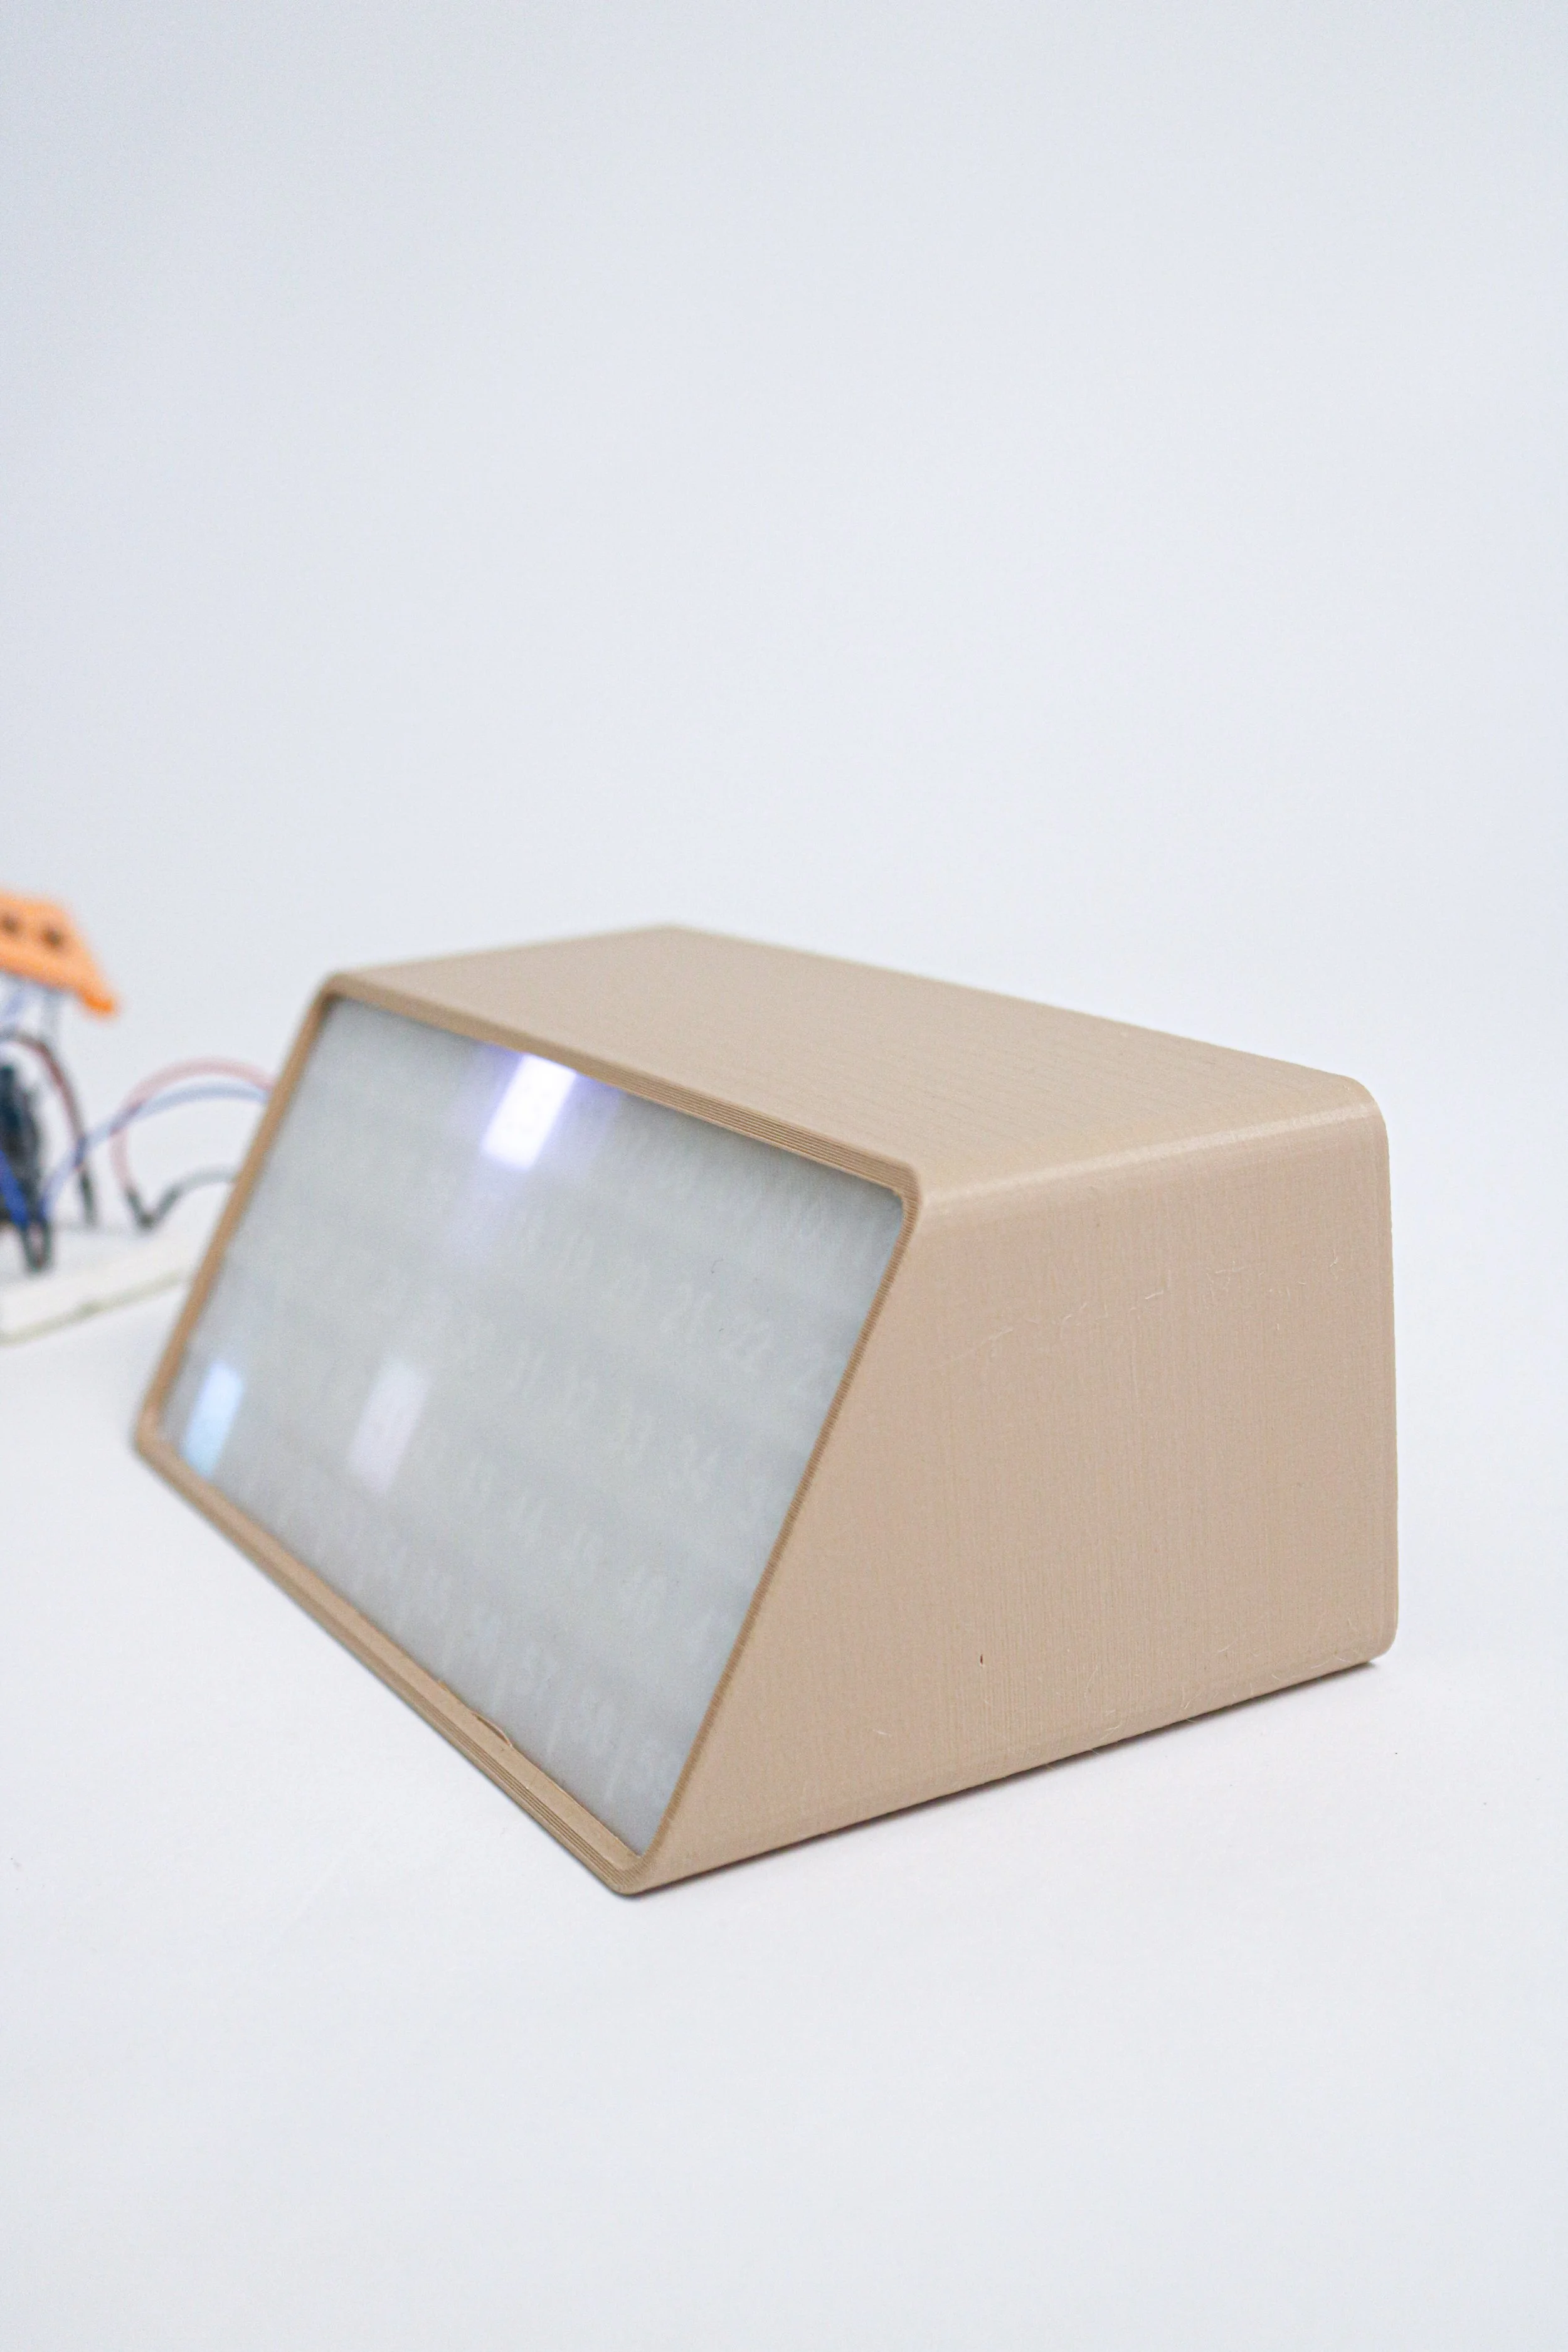
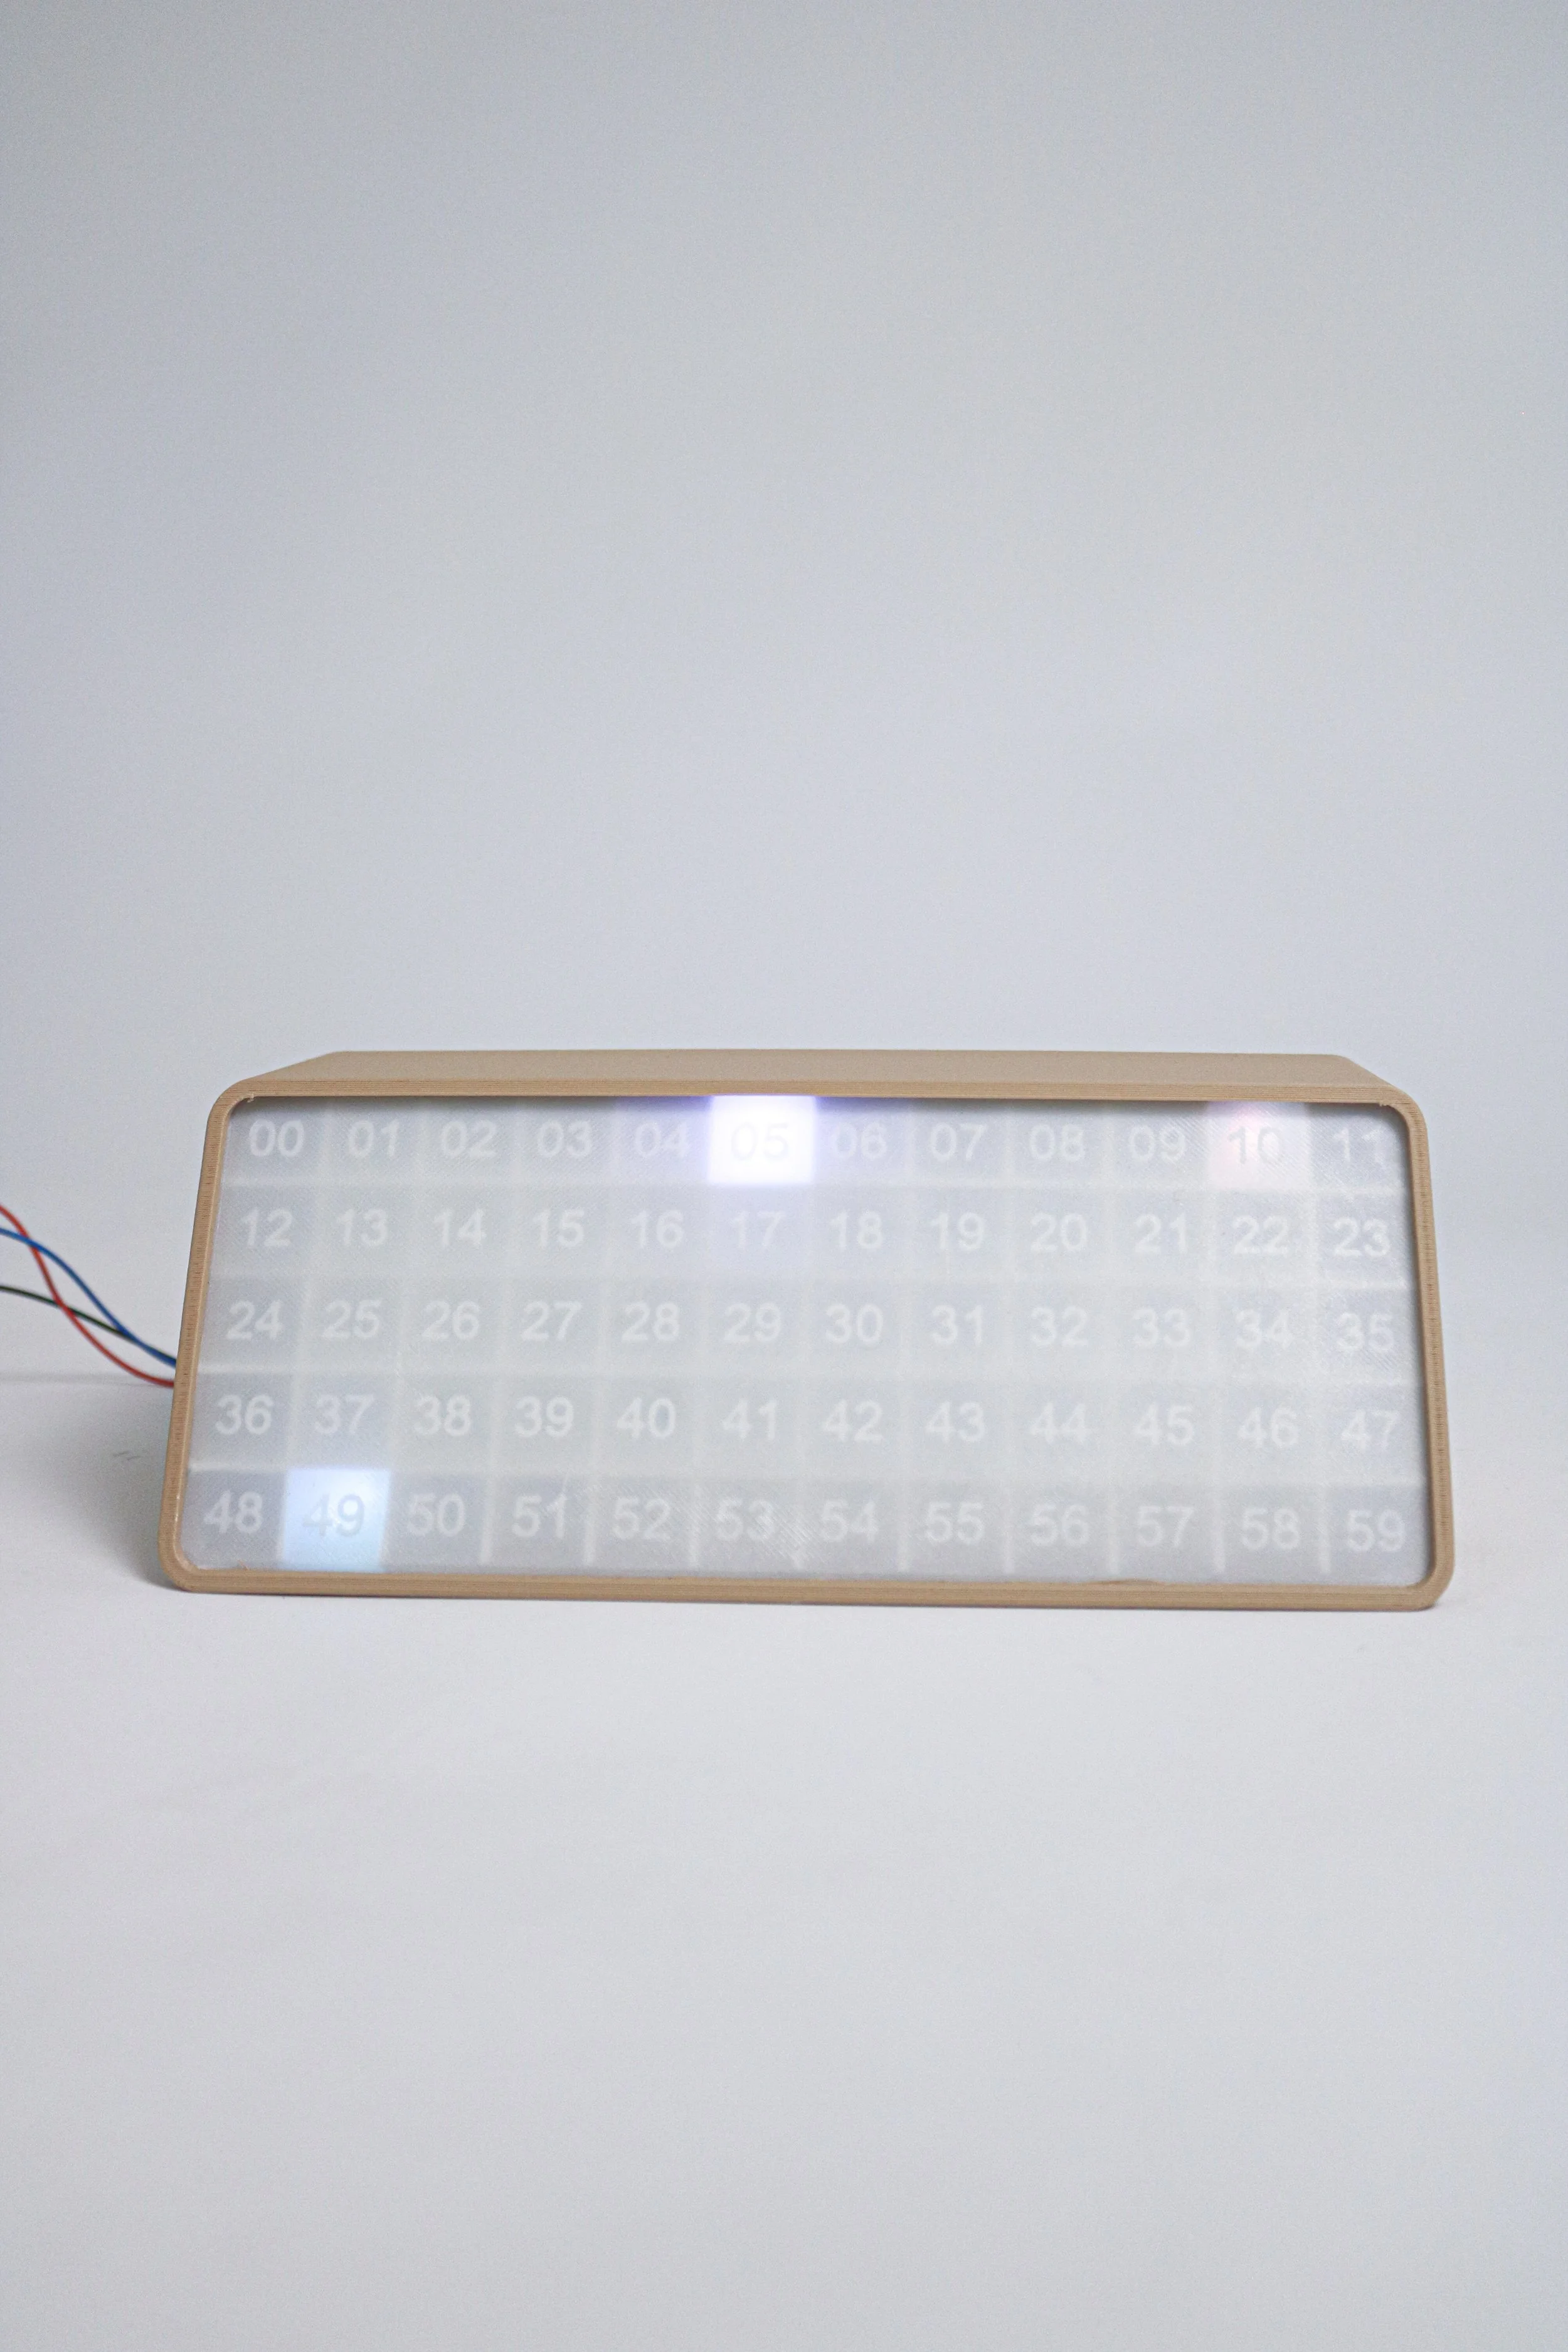
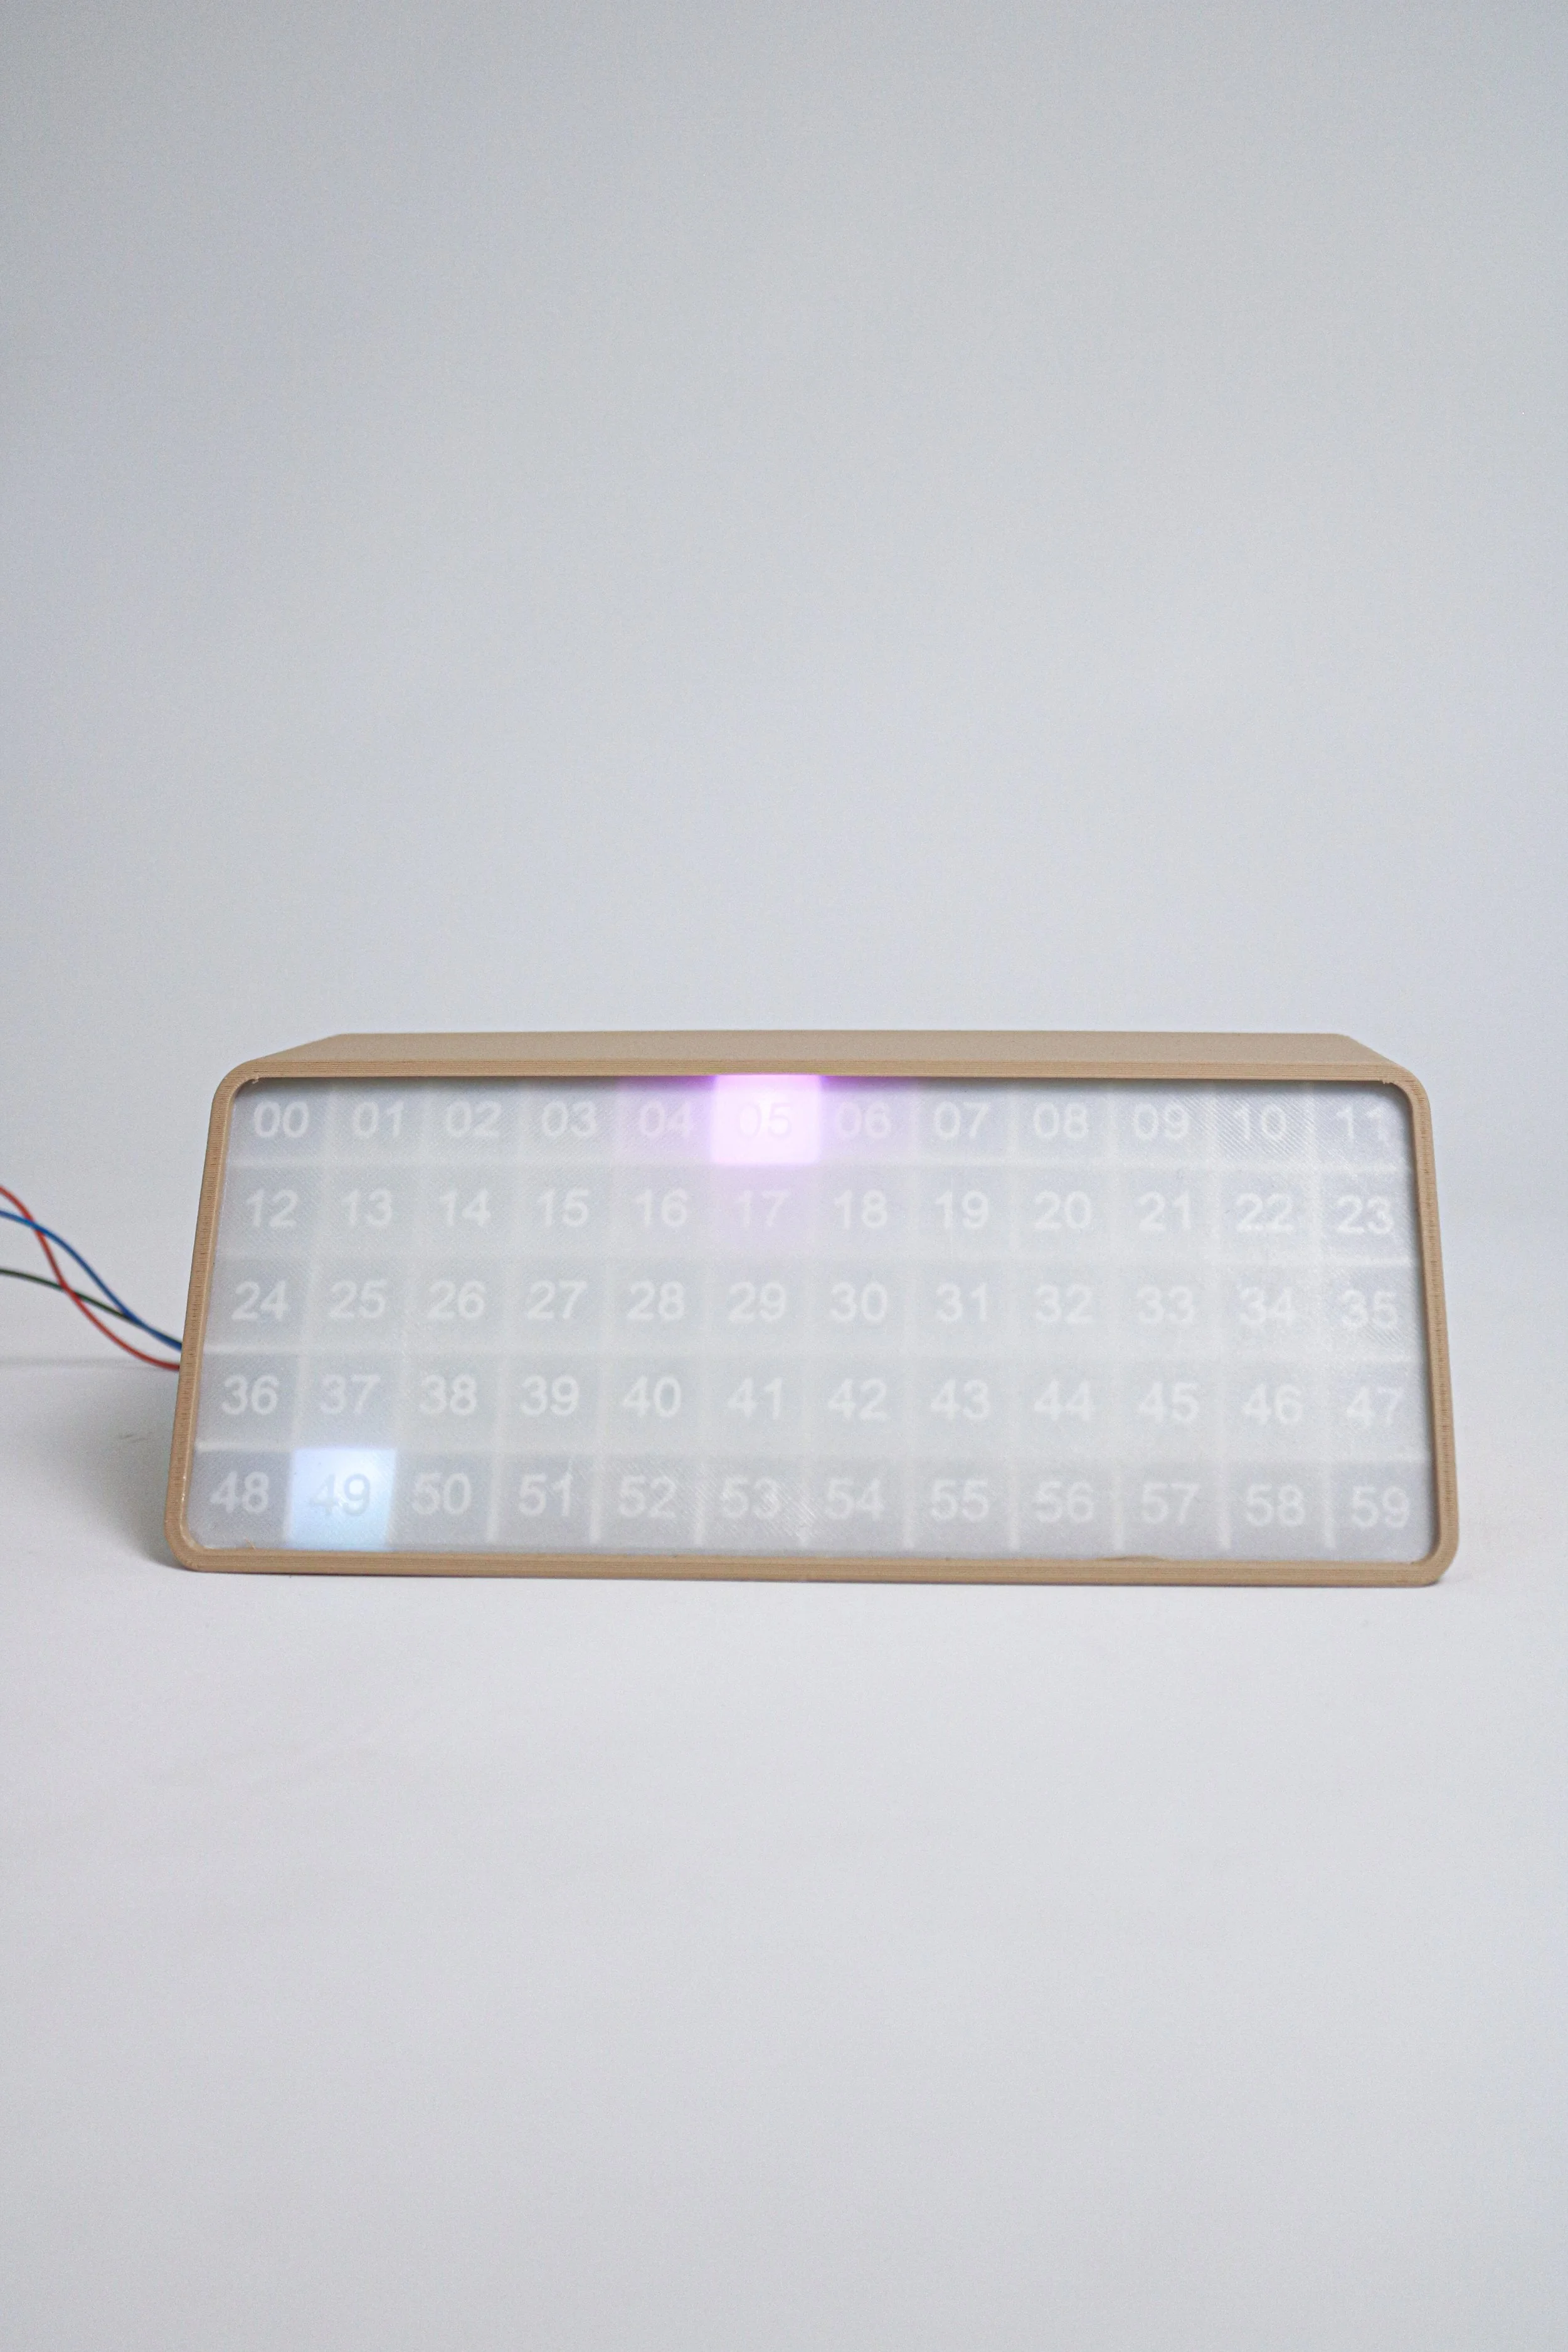
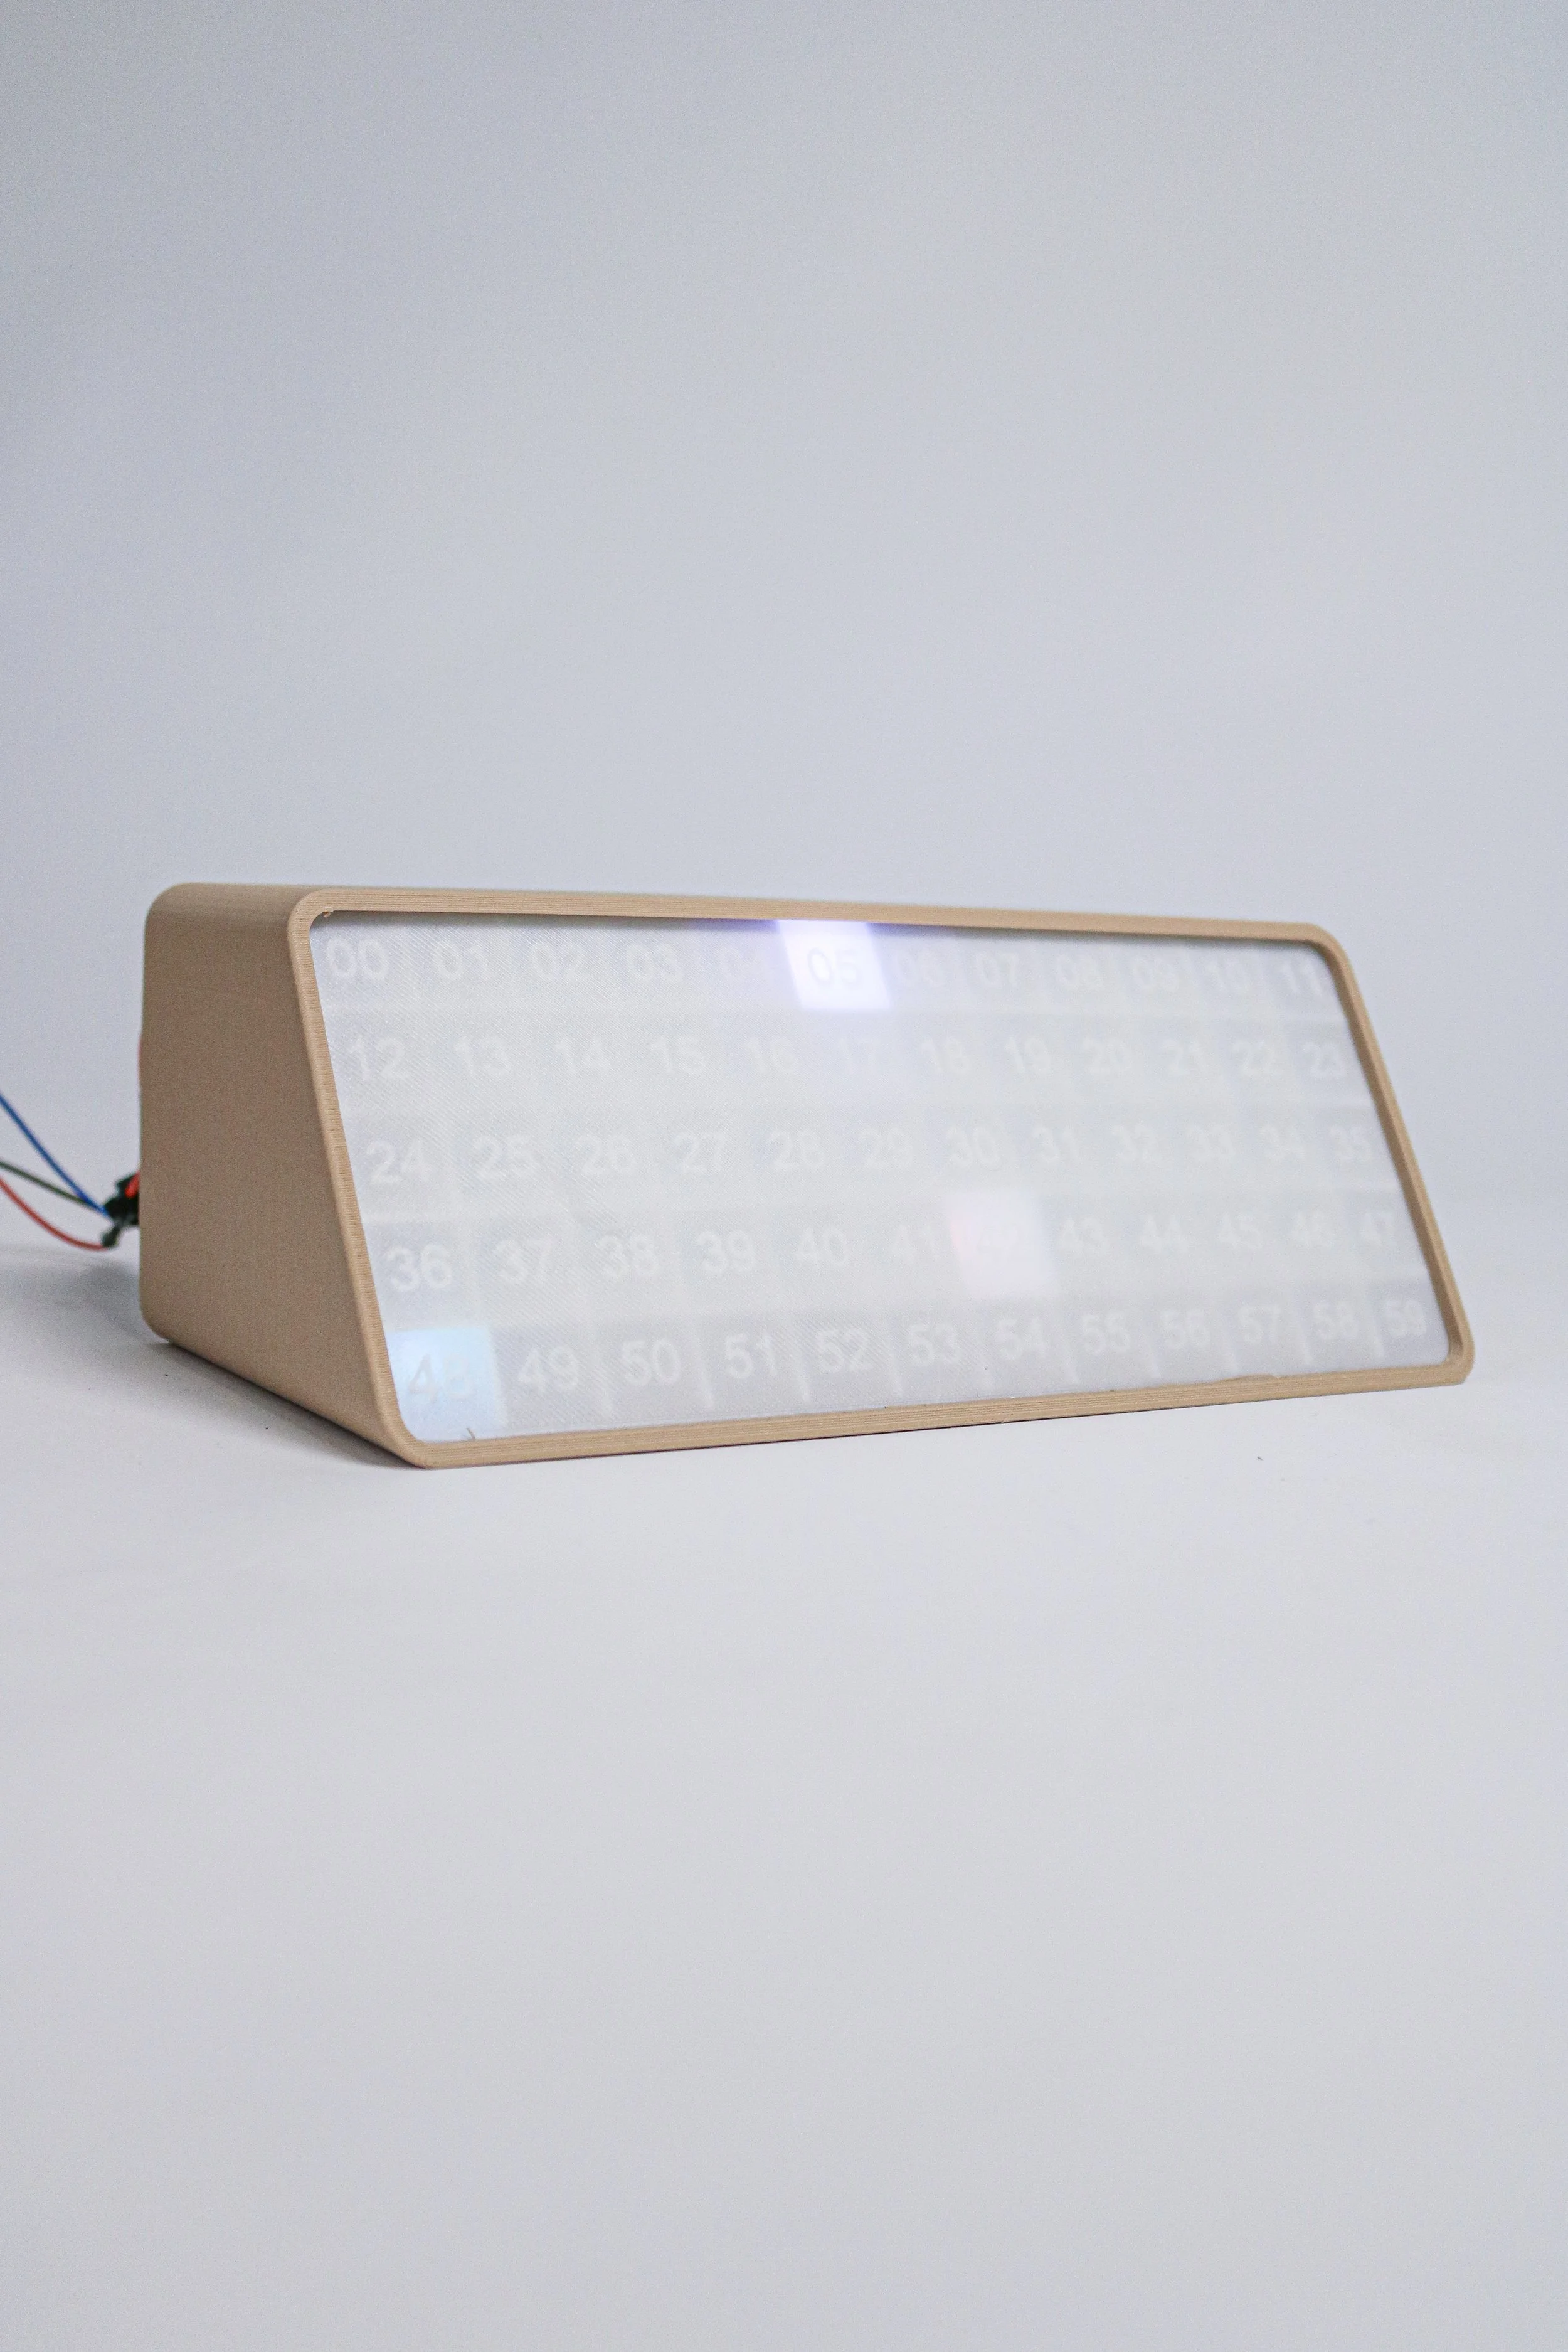
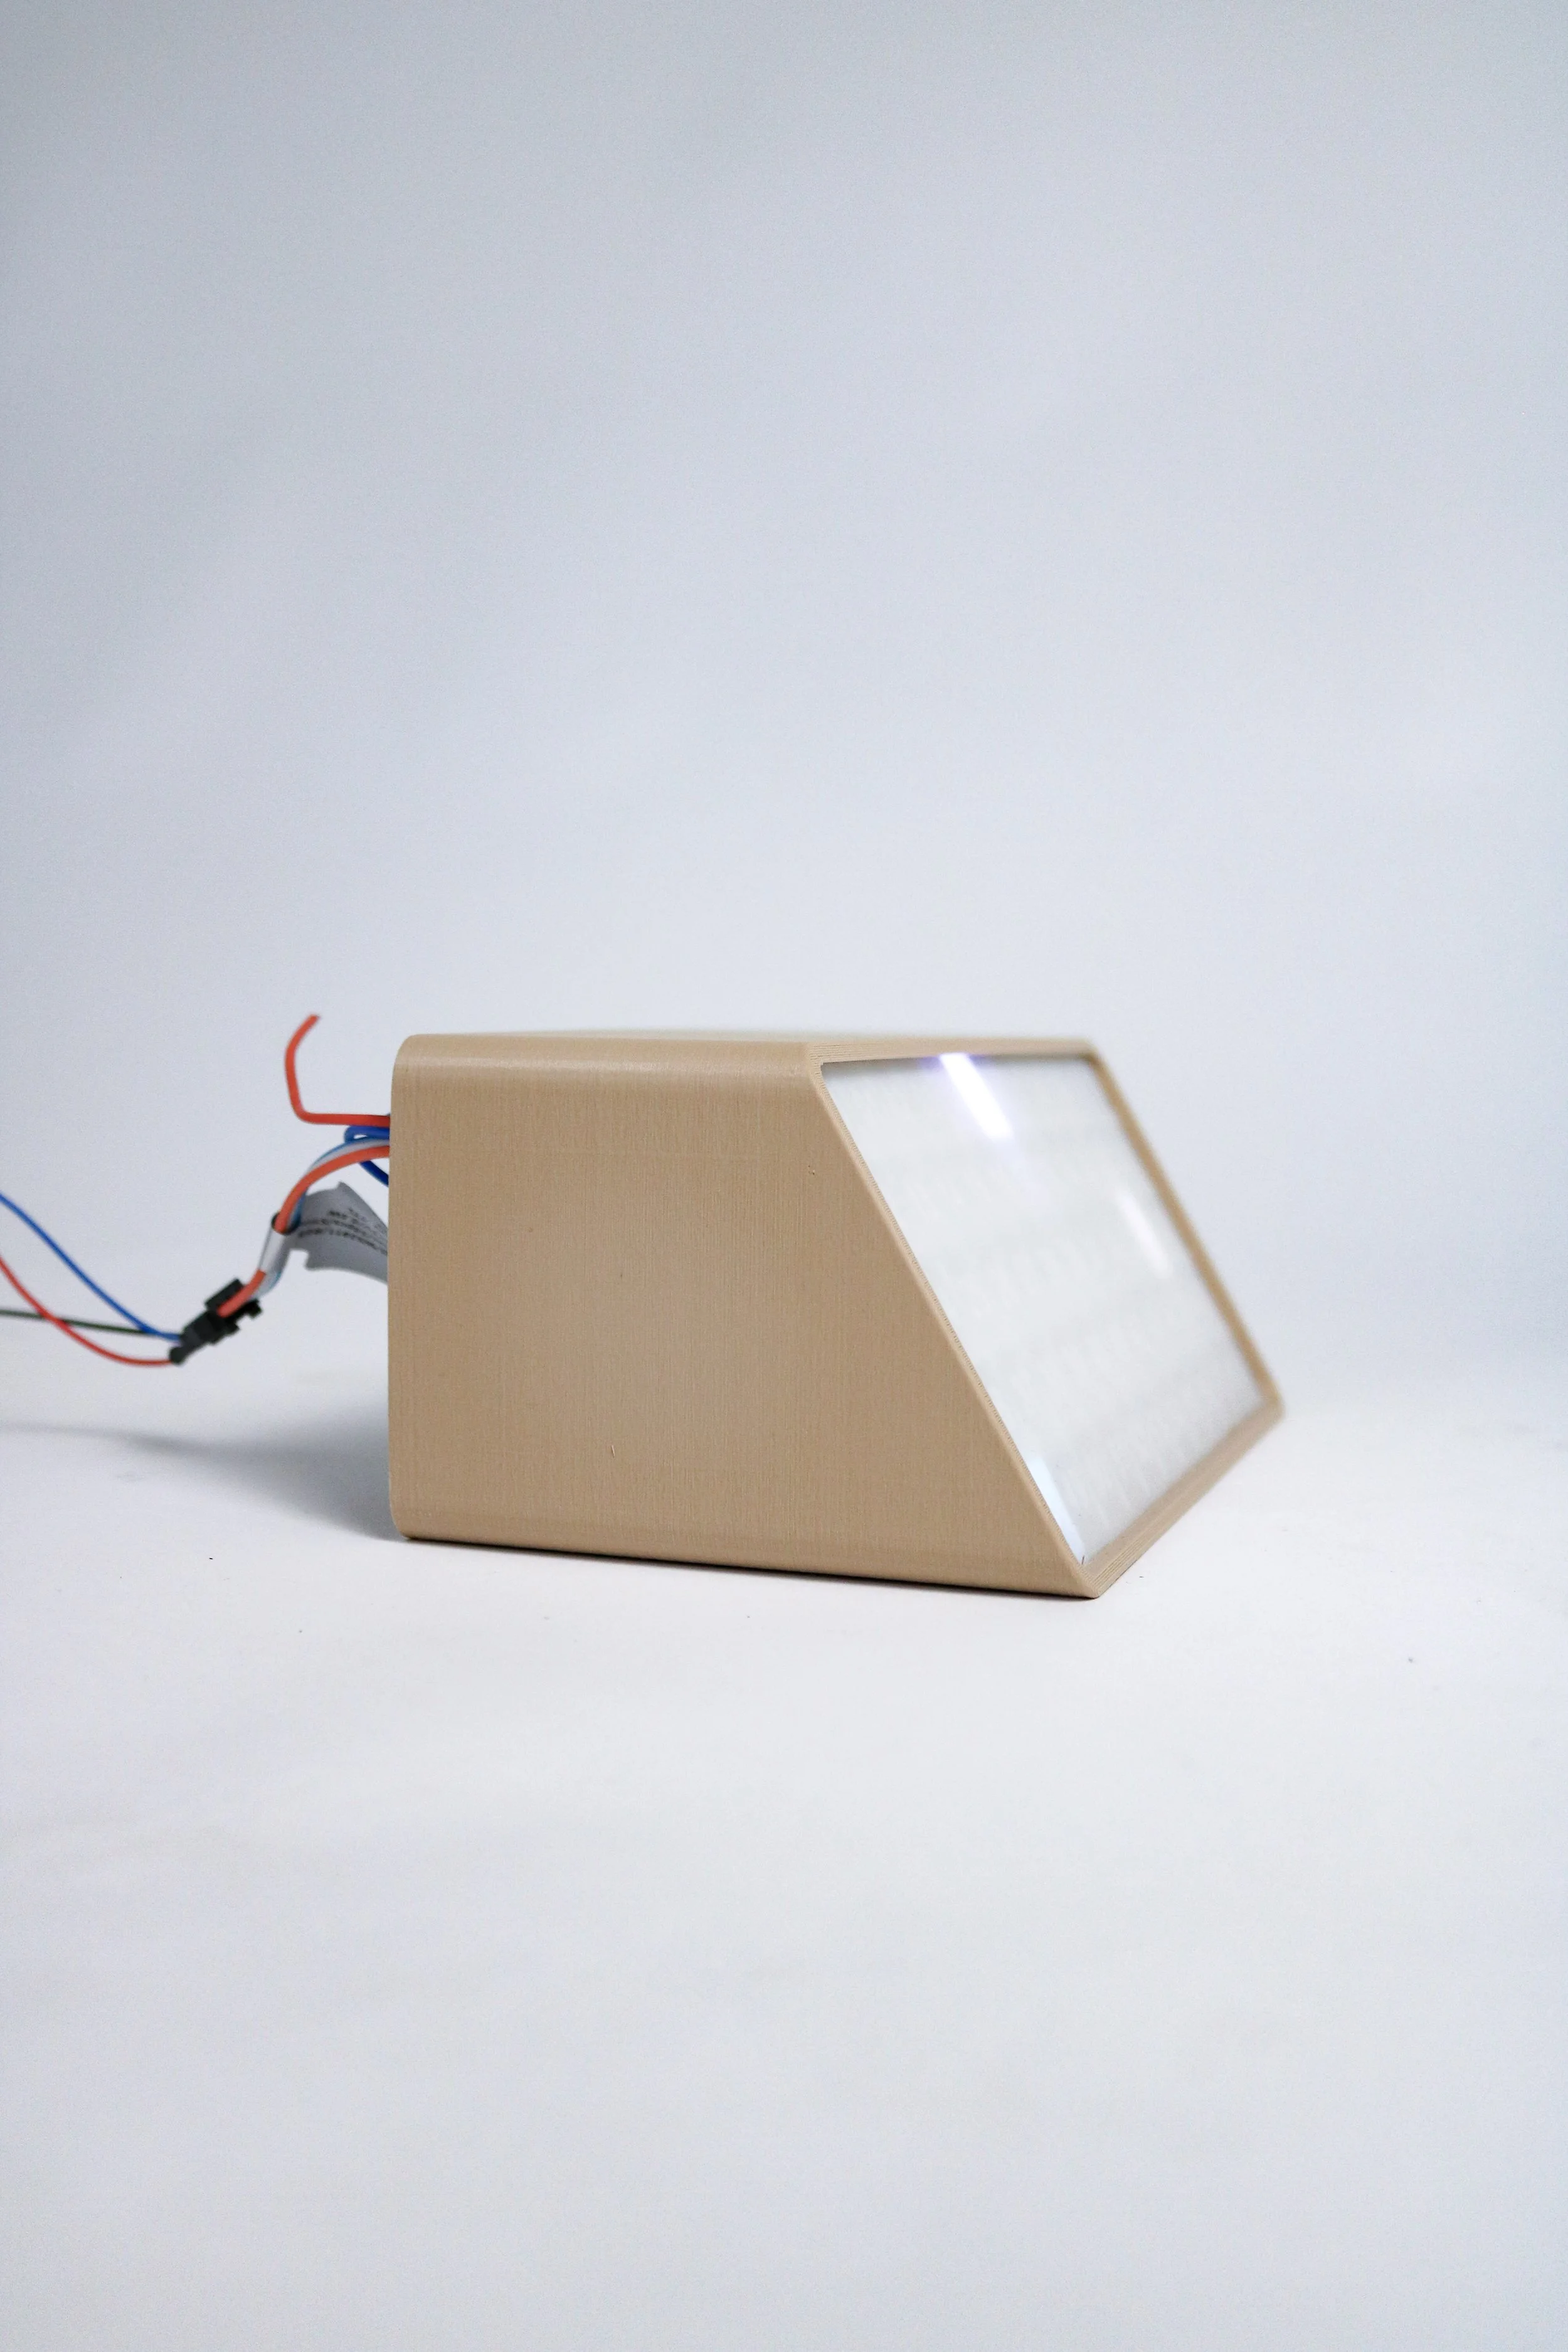
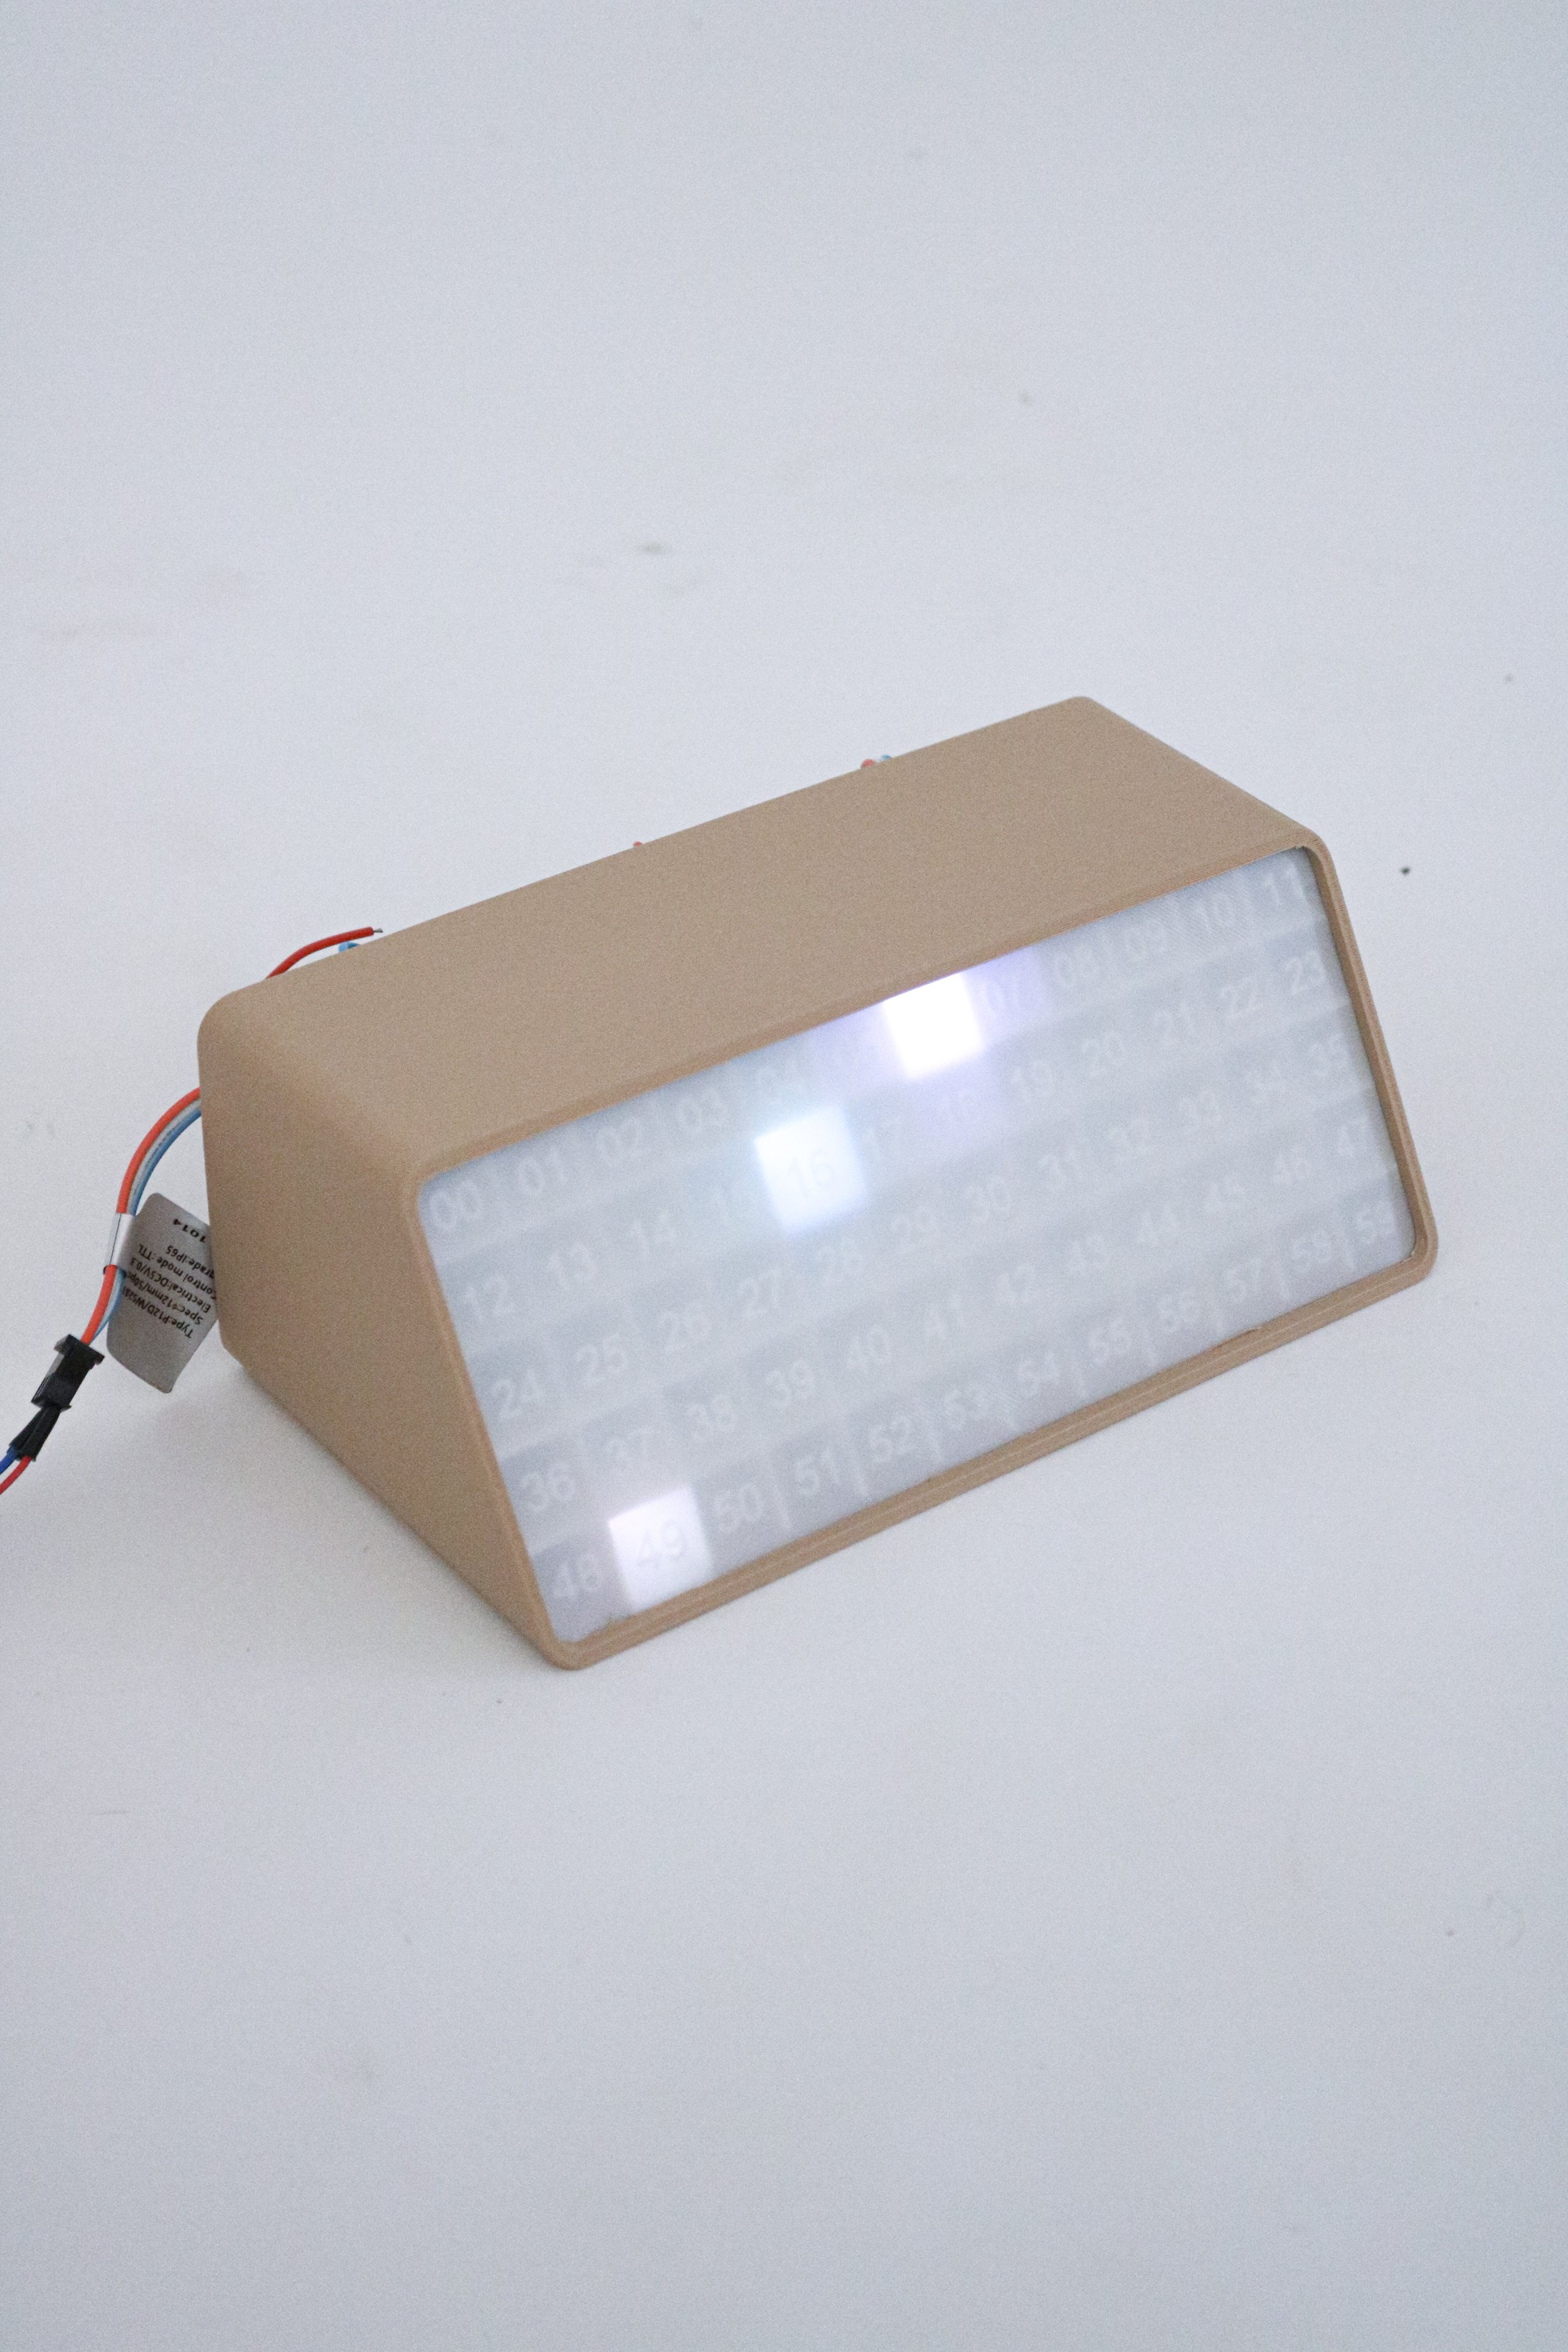
LED Clock
overview:
Inspired by the clock on the corner of John st. and Water st. in NYC this desk clock uses LEDs and 3 distinct colors to tell the time. I thought the idea of a grid of numbers with only a few numbers illuminated to communicate time was both simple and beautiful. Adapting a more minimalistic and organic design proved to make this a unique and beautiful desk accessory.
skills:
3D Modeling, Circuit Design, Computer Programming, and Product Design
material:
PLA plastic, Arduino, Strip LED lights
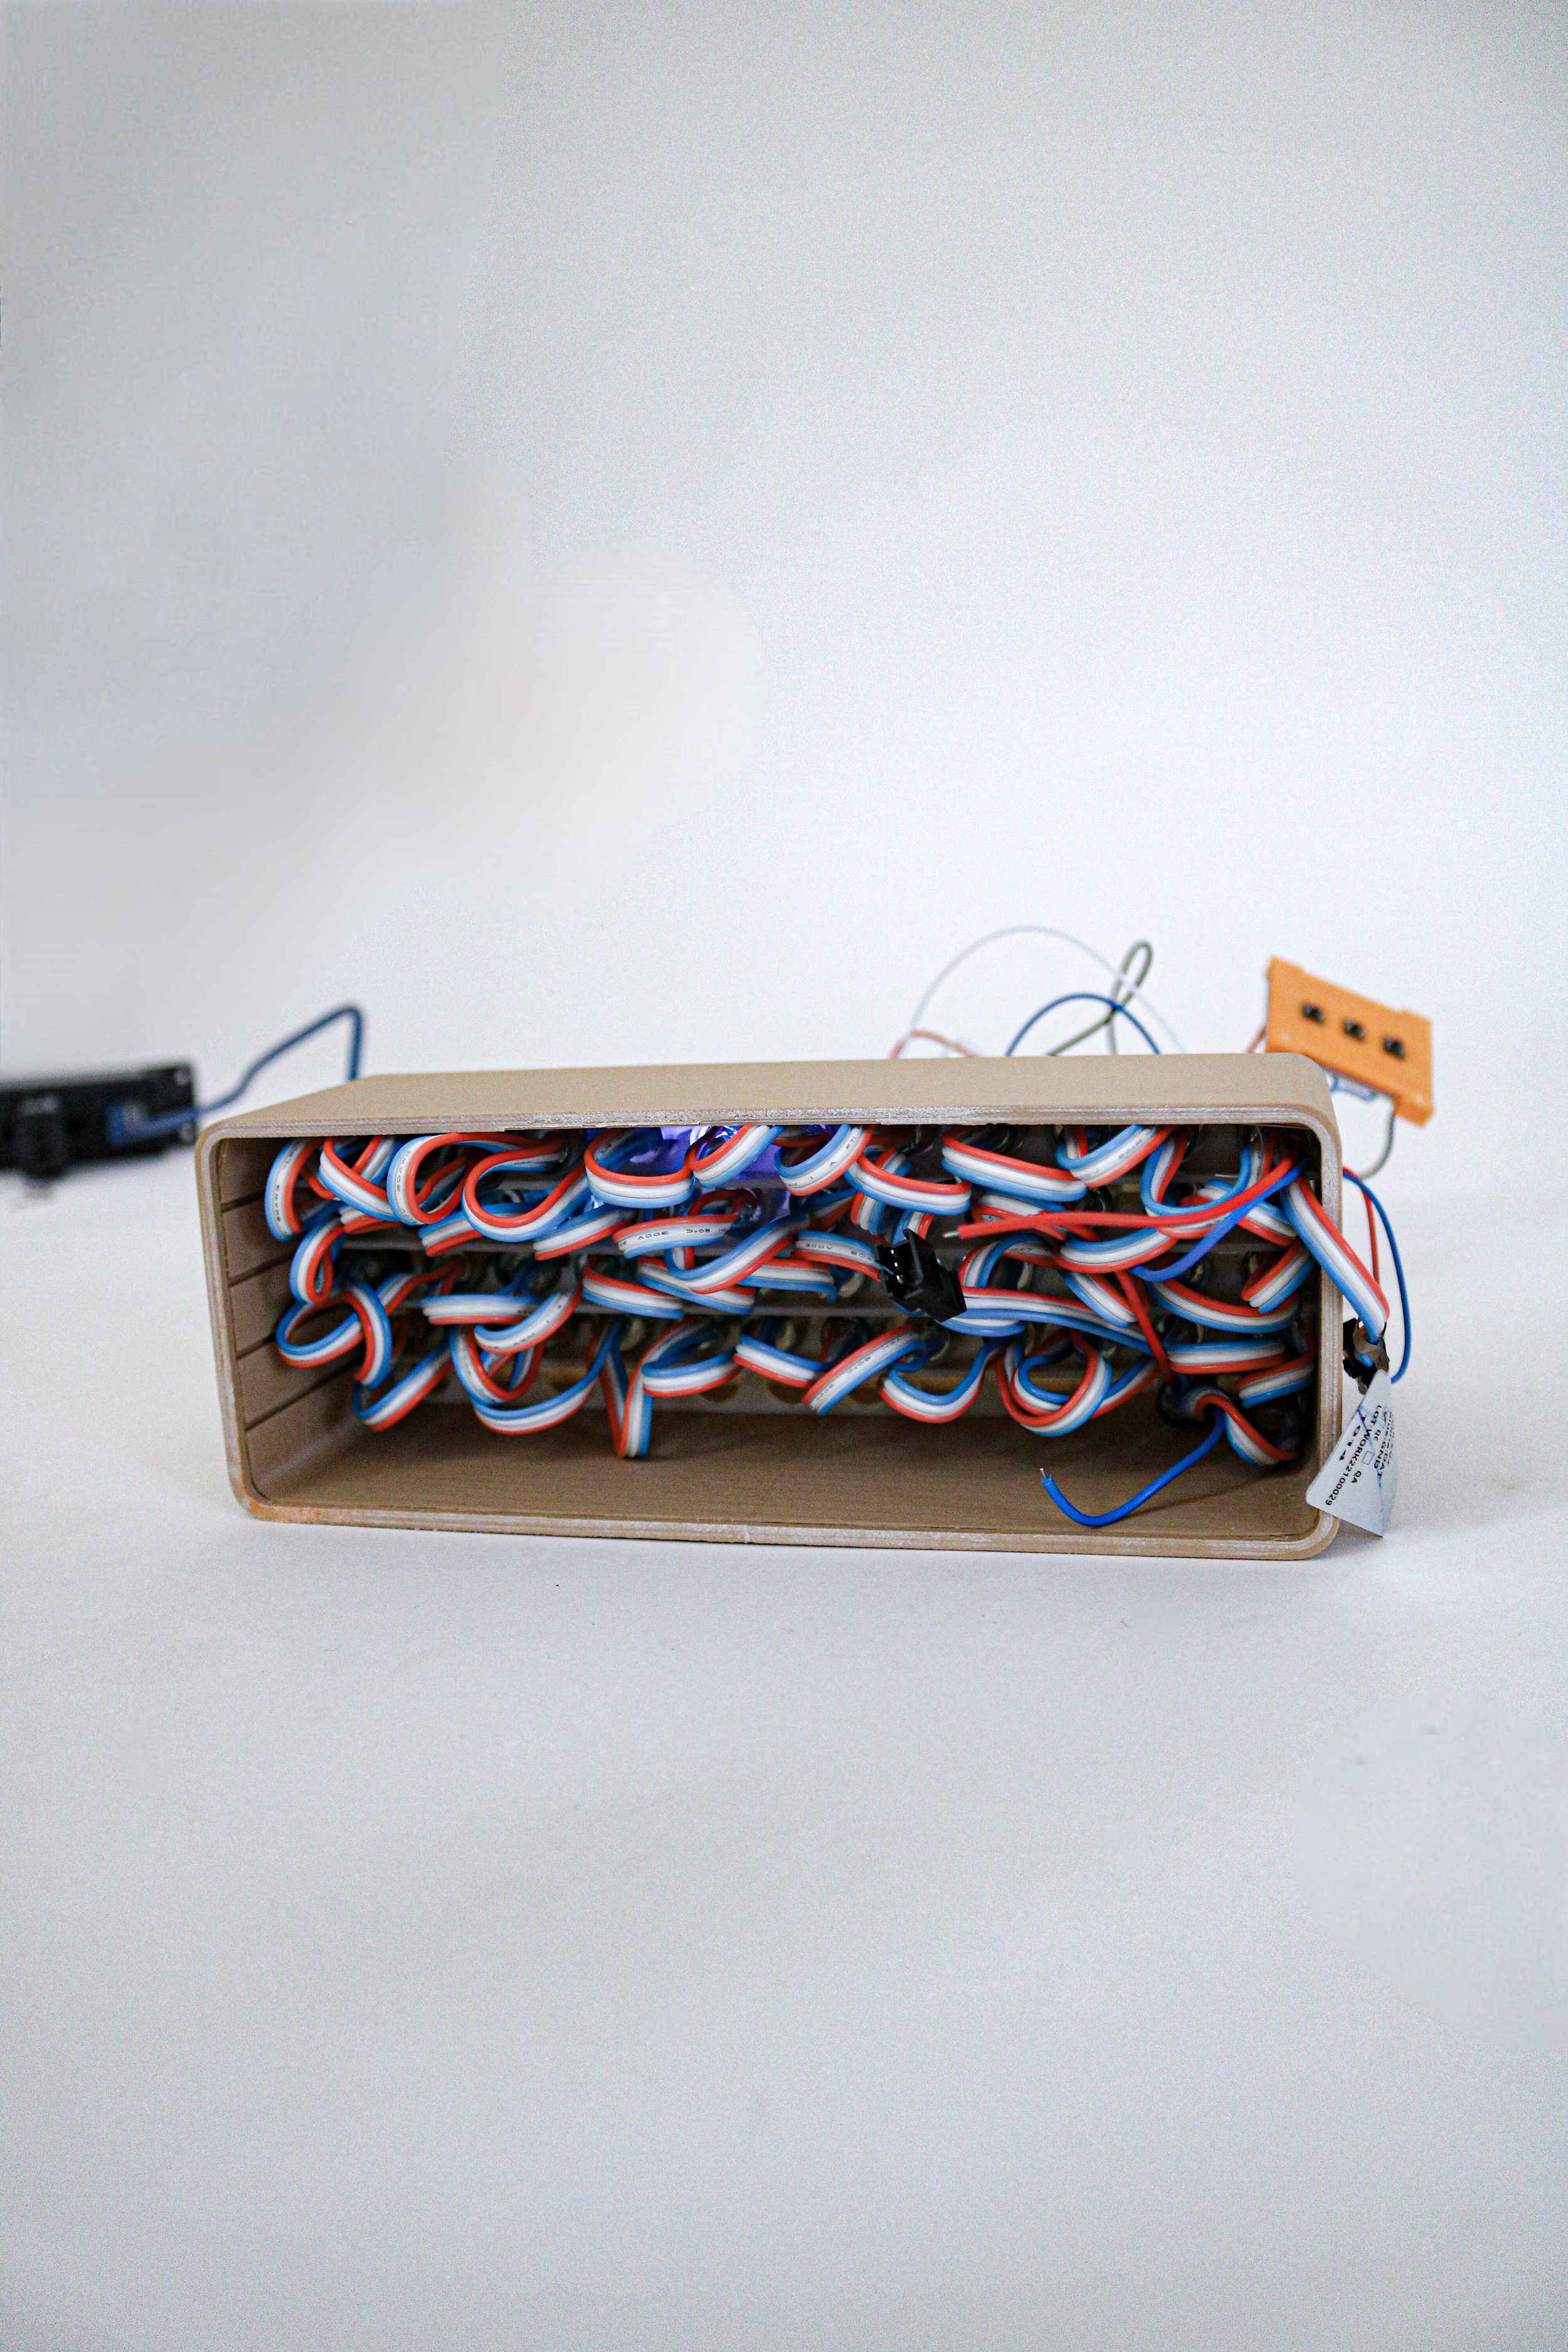
challenges:
I started this project to learn more about electrical engineering as i’m not extremely adept in the field. Over the course of the project I learned more about motor controllers, drawing electrical schematics, and soldering my own Proto-boards. As far as the physical design, the biggest challenge was designing racks that hold the led lights on the inside, I wanted to make sure they were modular and reusable. This way It would be easy to make multiple prototypes of the clock without reprinting every part over and over, saving me a lot of print time. There were quite a few coding challenges that popped up as well that required custom algorithms as I was using a limited C++ library on a memory scarce device.
improvements:
As this is a prototype, I 3D printed (PLA Plastic) the bulk of the physical components. If it were to go into production I would much rather use a heftier material for a much more quality feel, possibly making a mold and casting the shell out of concrete or a similar material. I admit this is an odd choice for an housing and could prove to be brittle, however the feel in hand would be second to none. The lithopane would have to change to some sort of frosted glass, some sort of paper, or remain a thin plastic sheet.

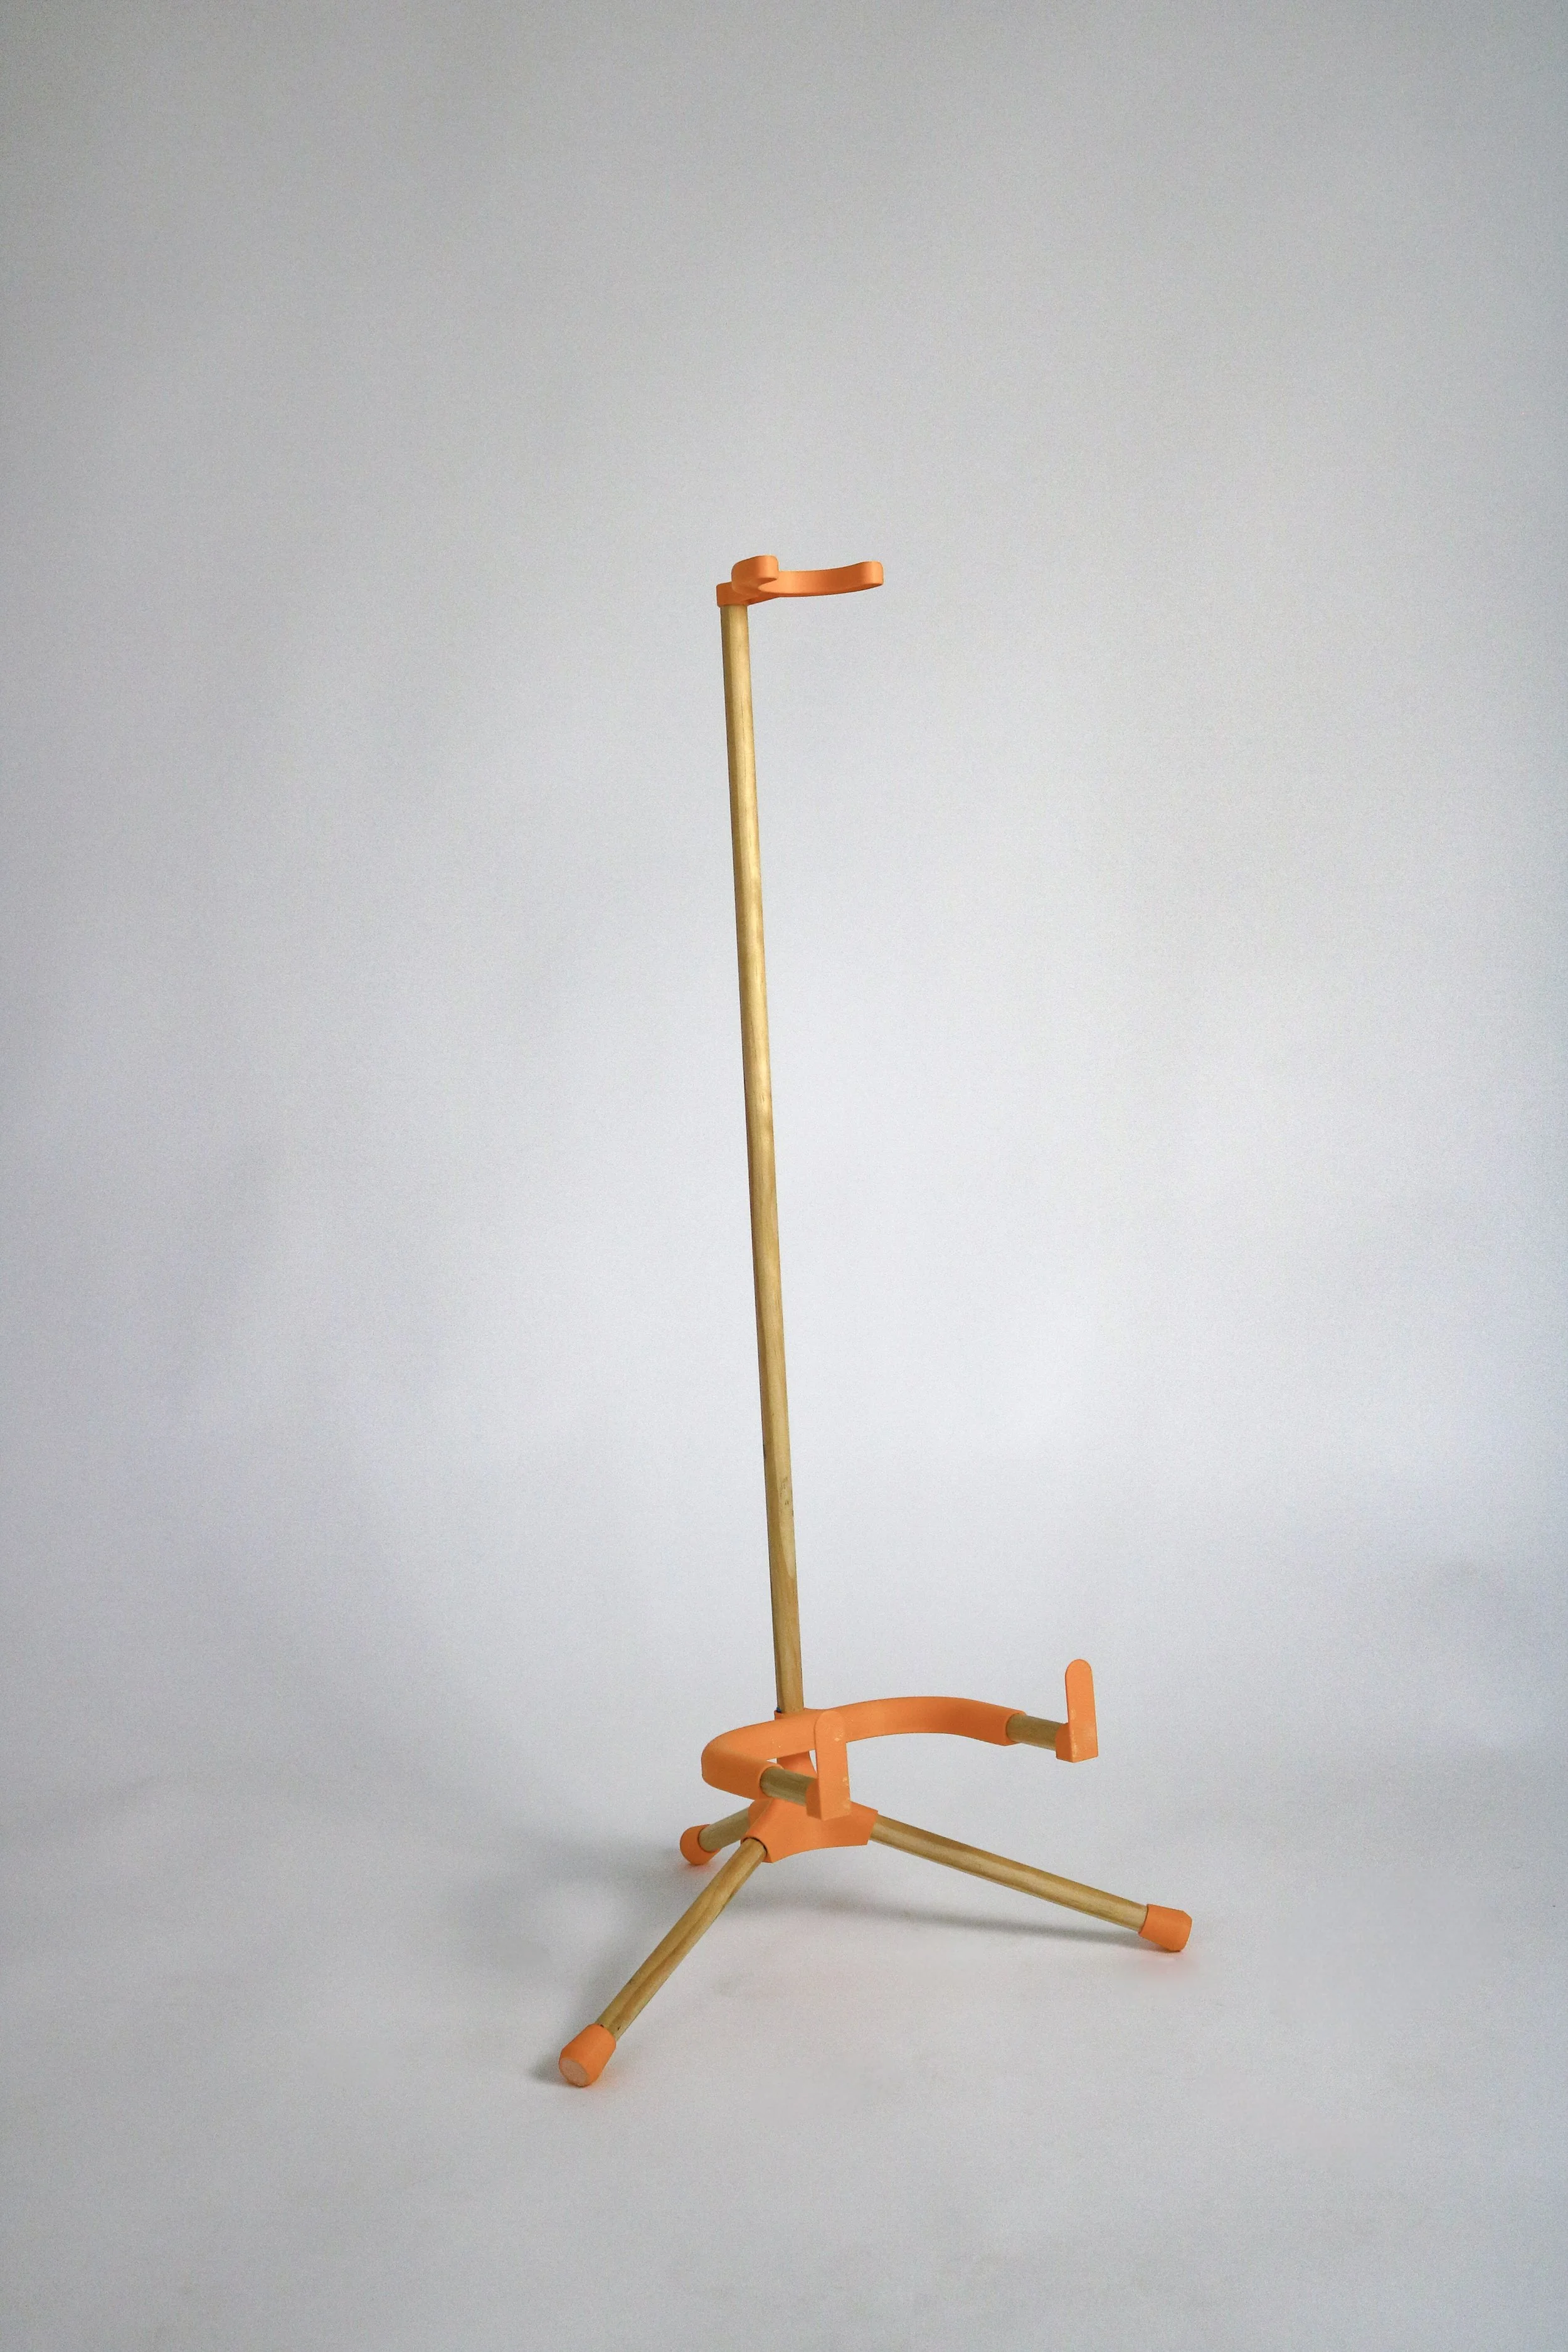
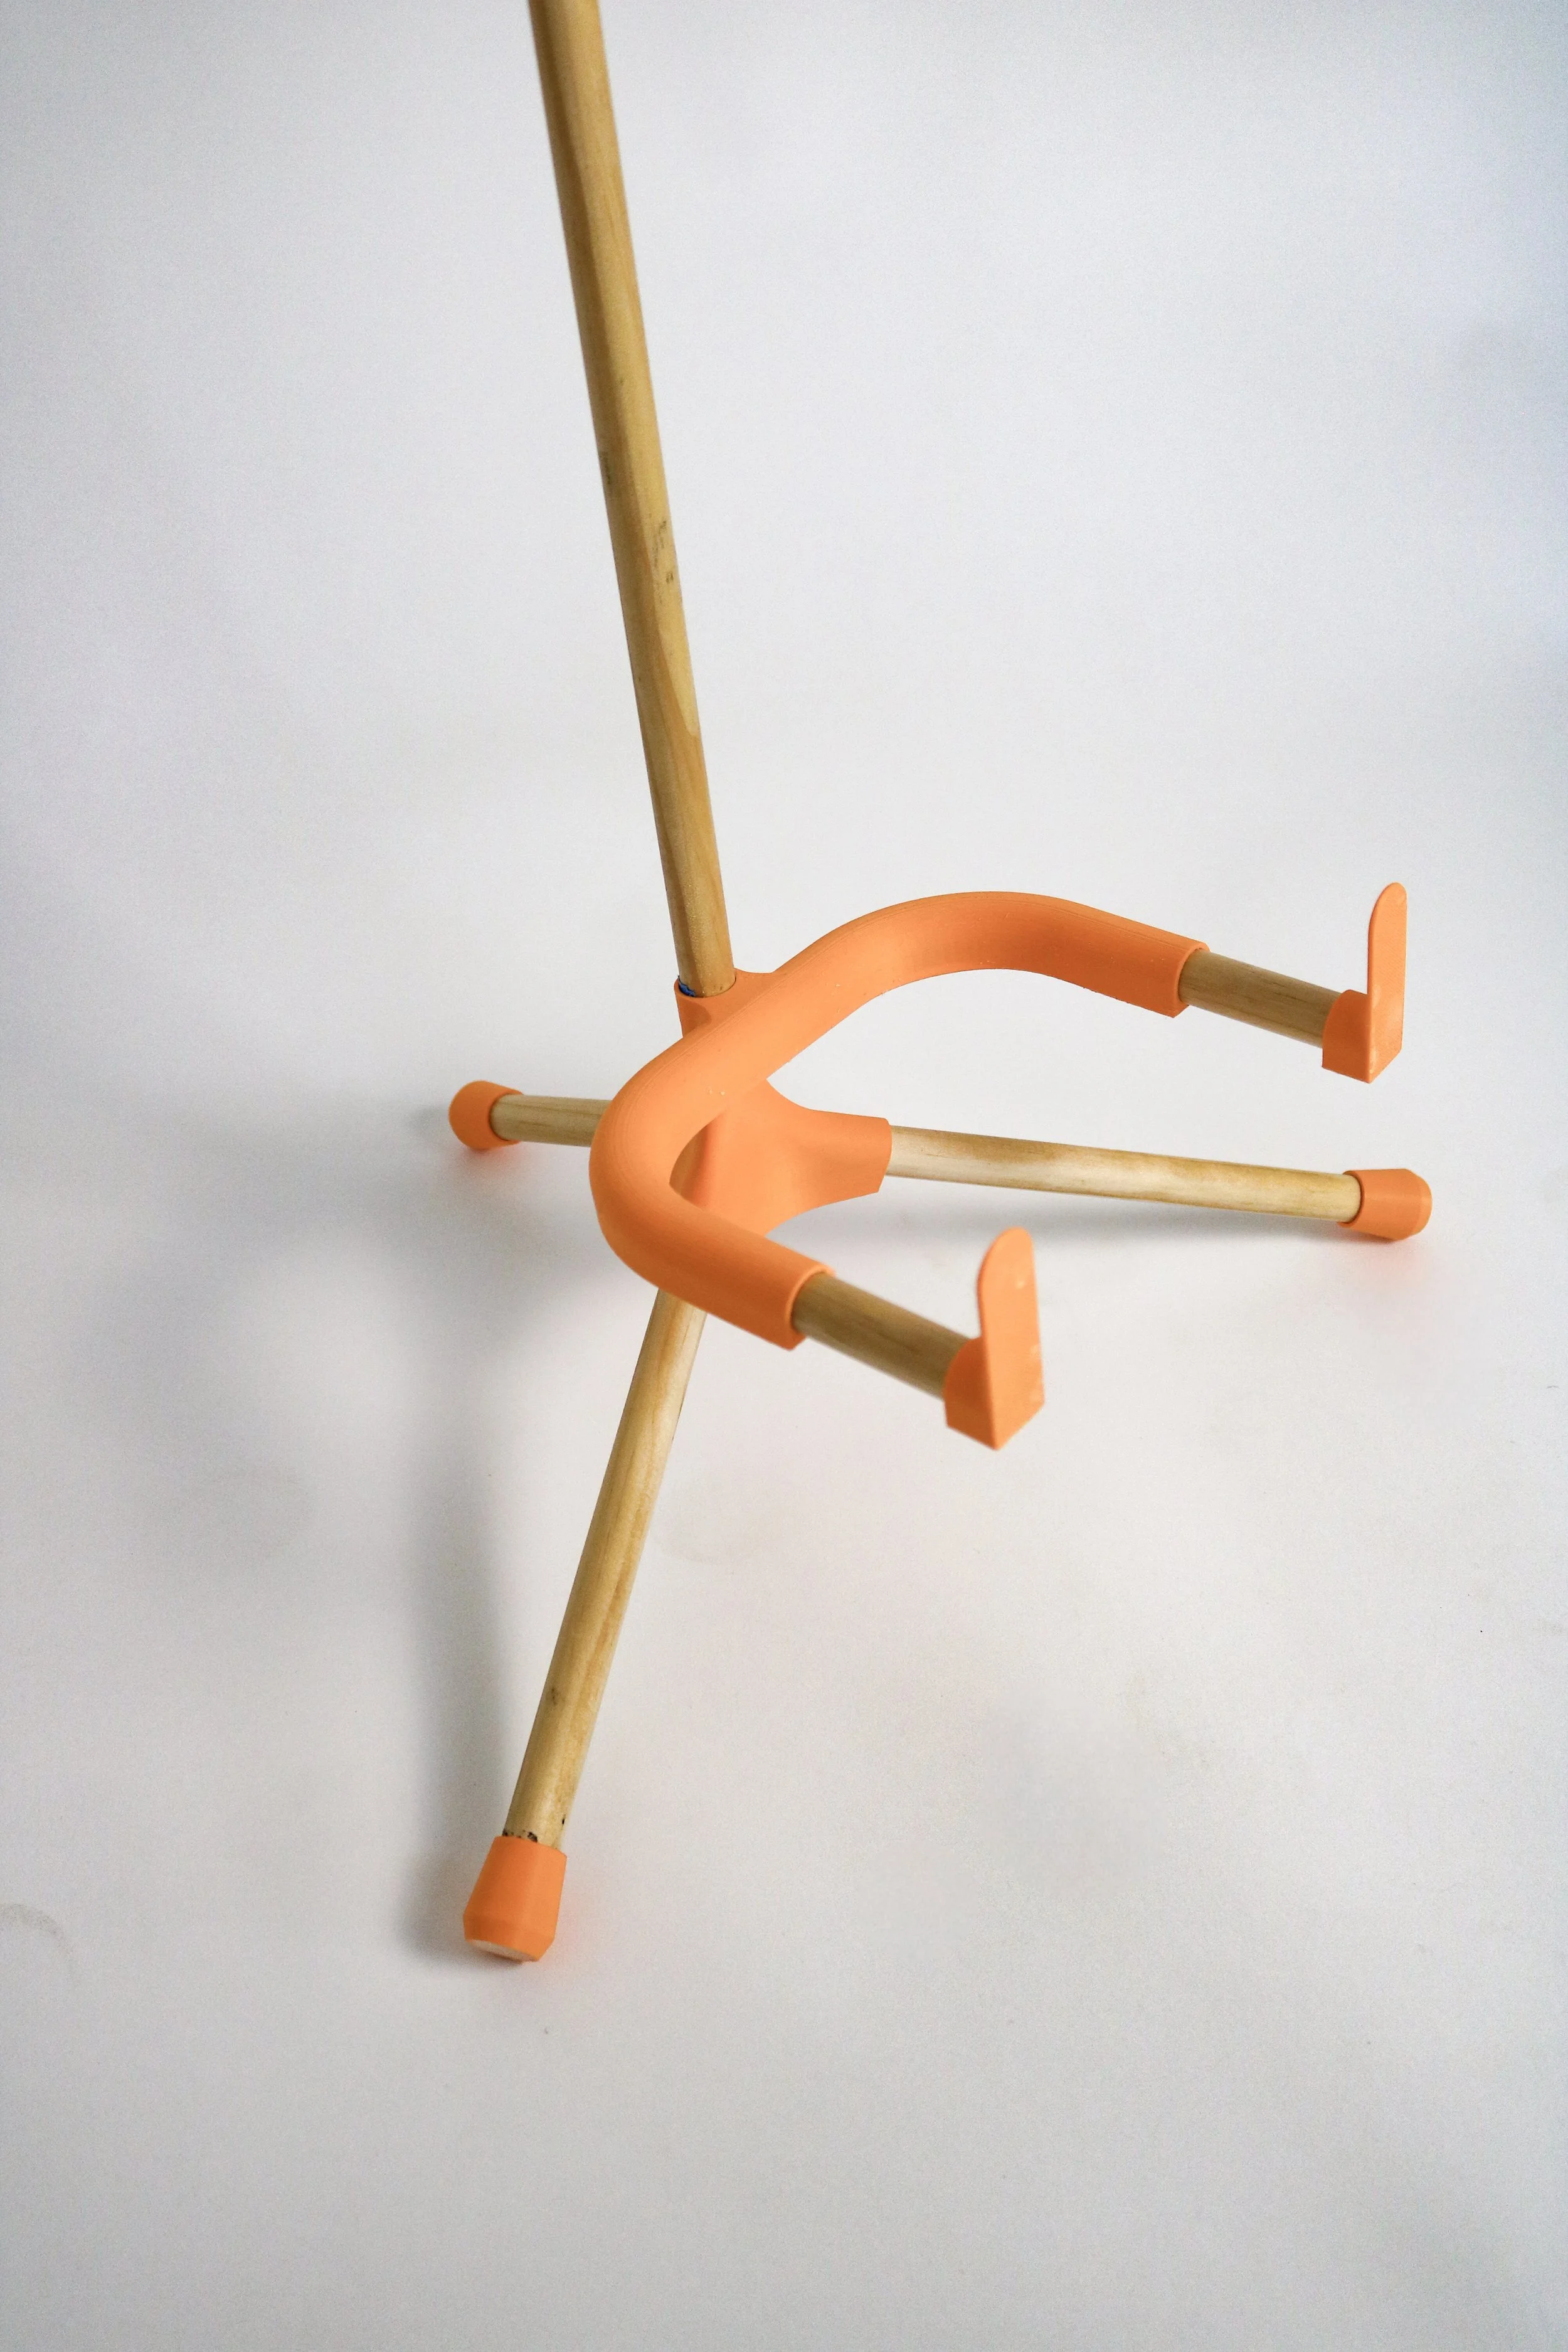
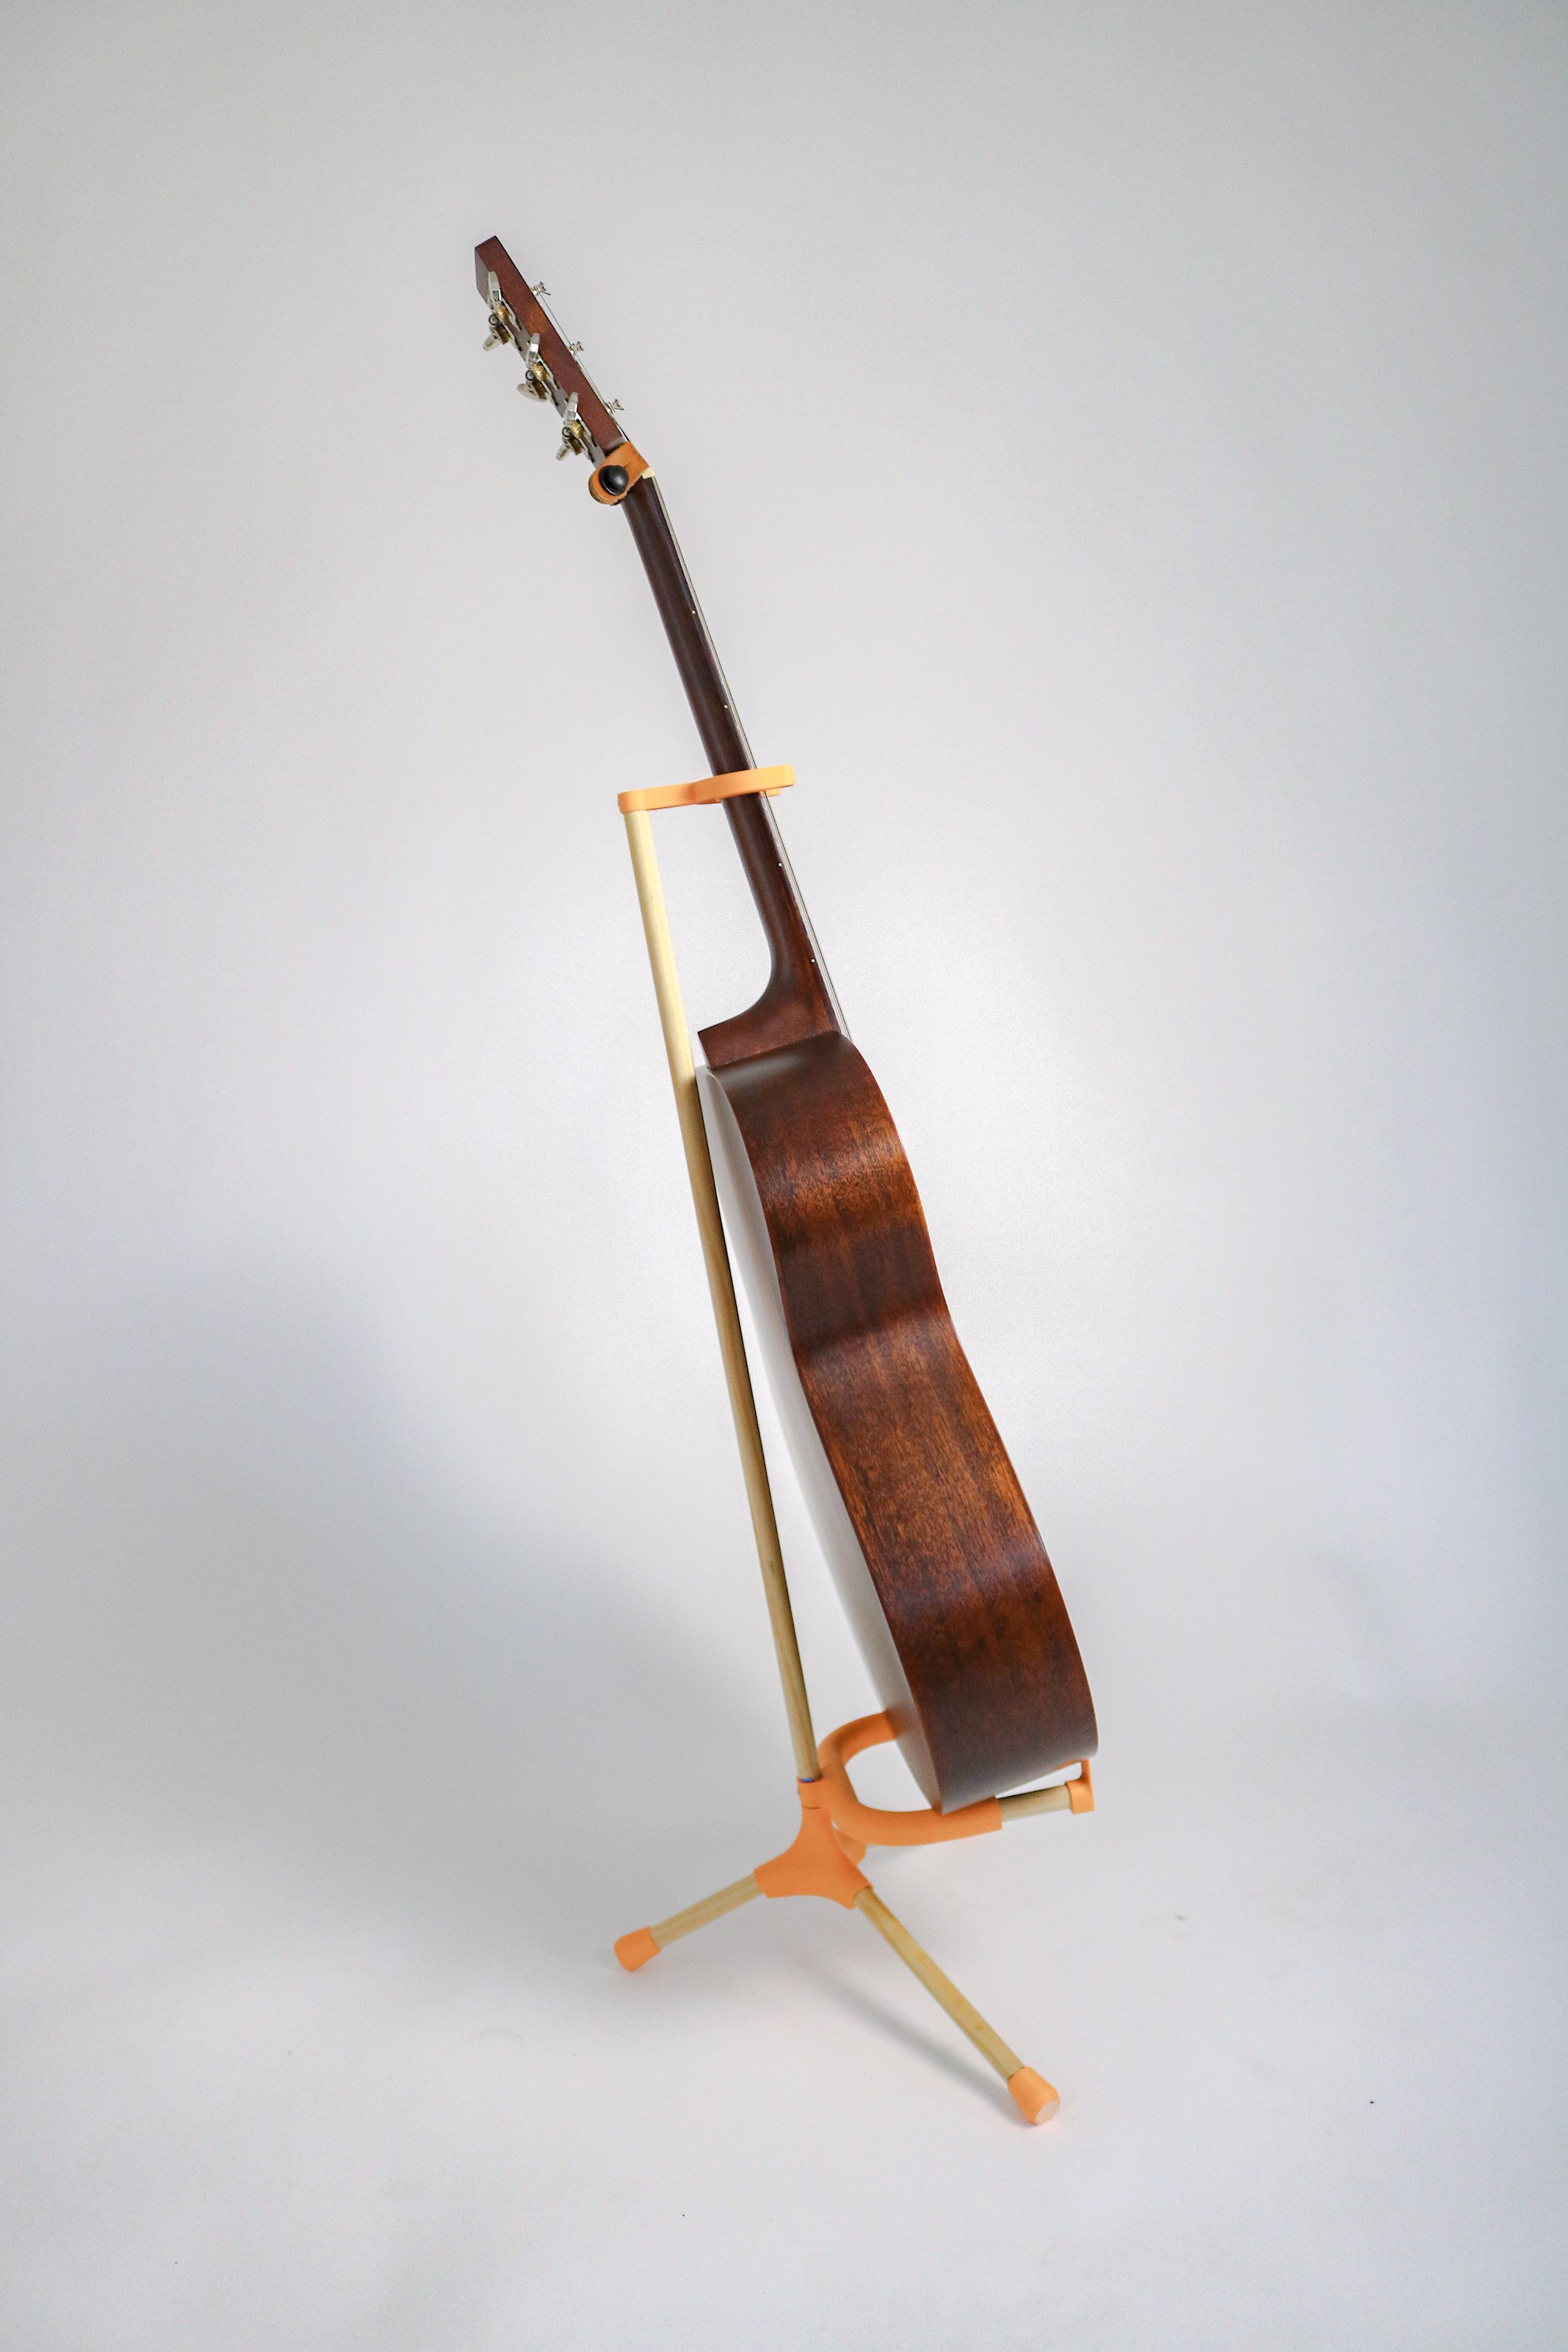
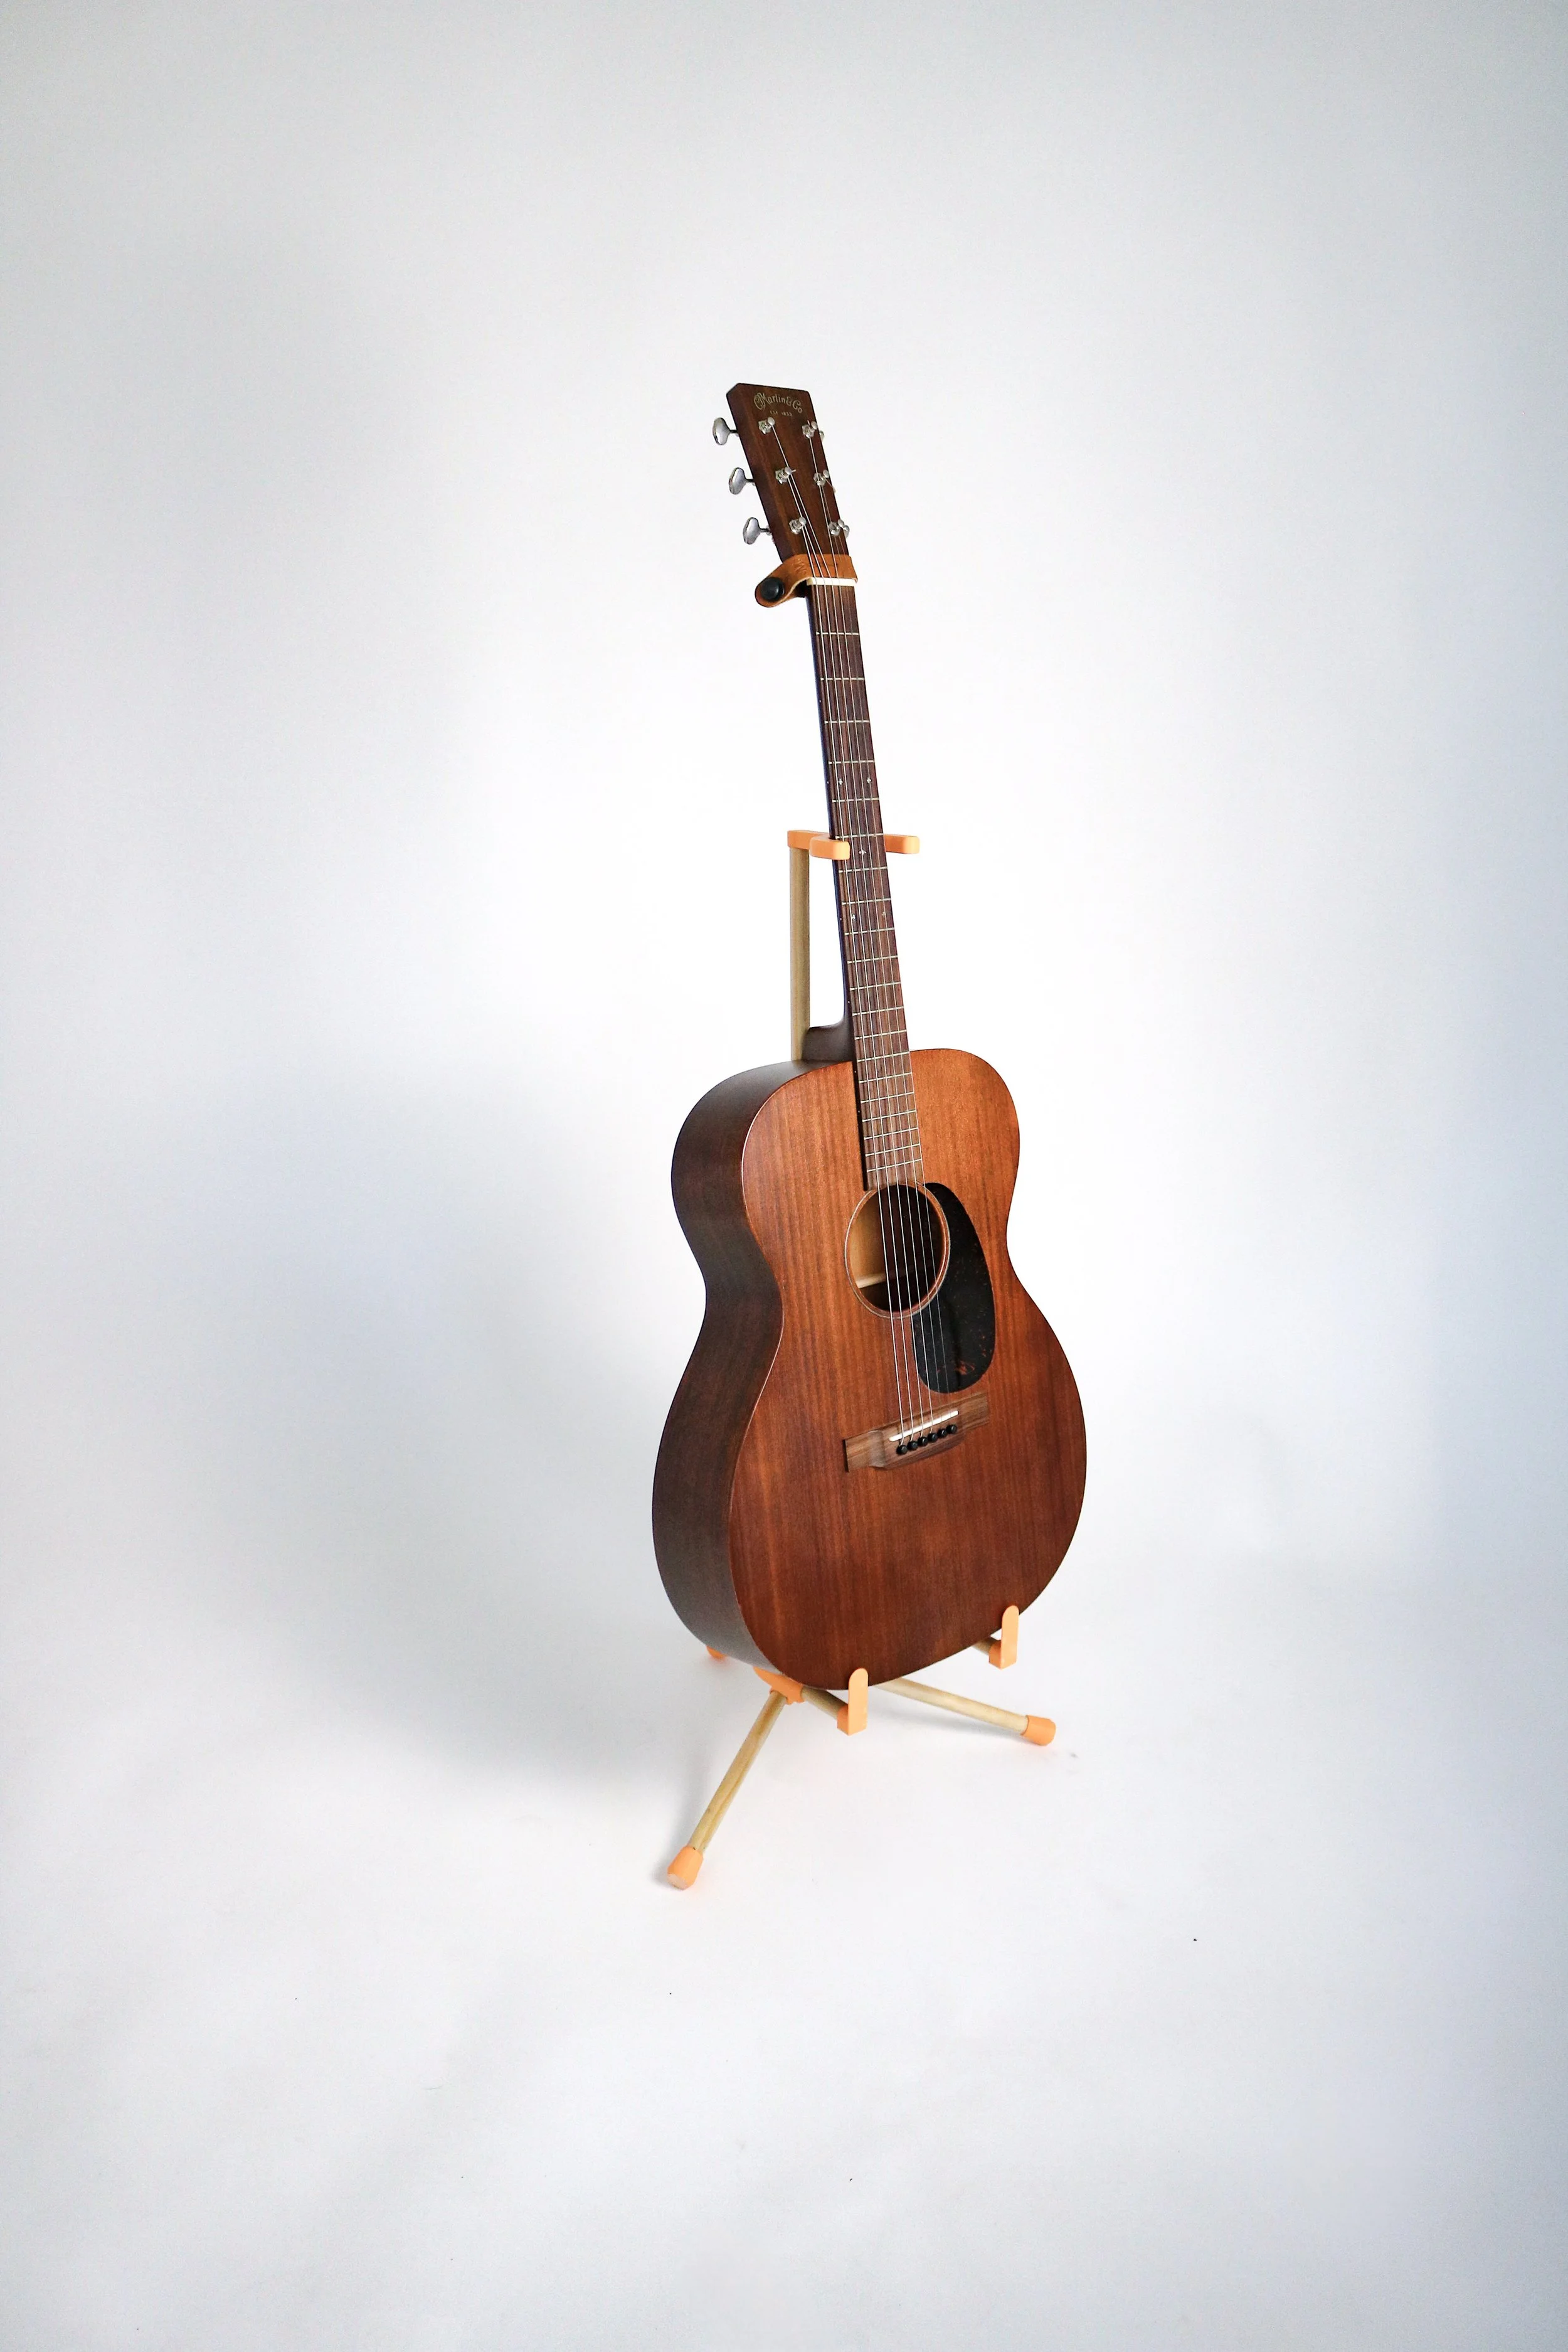
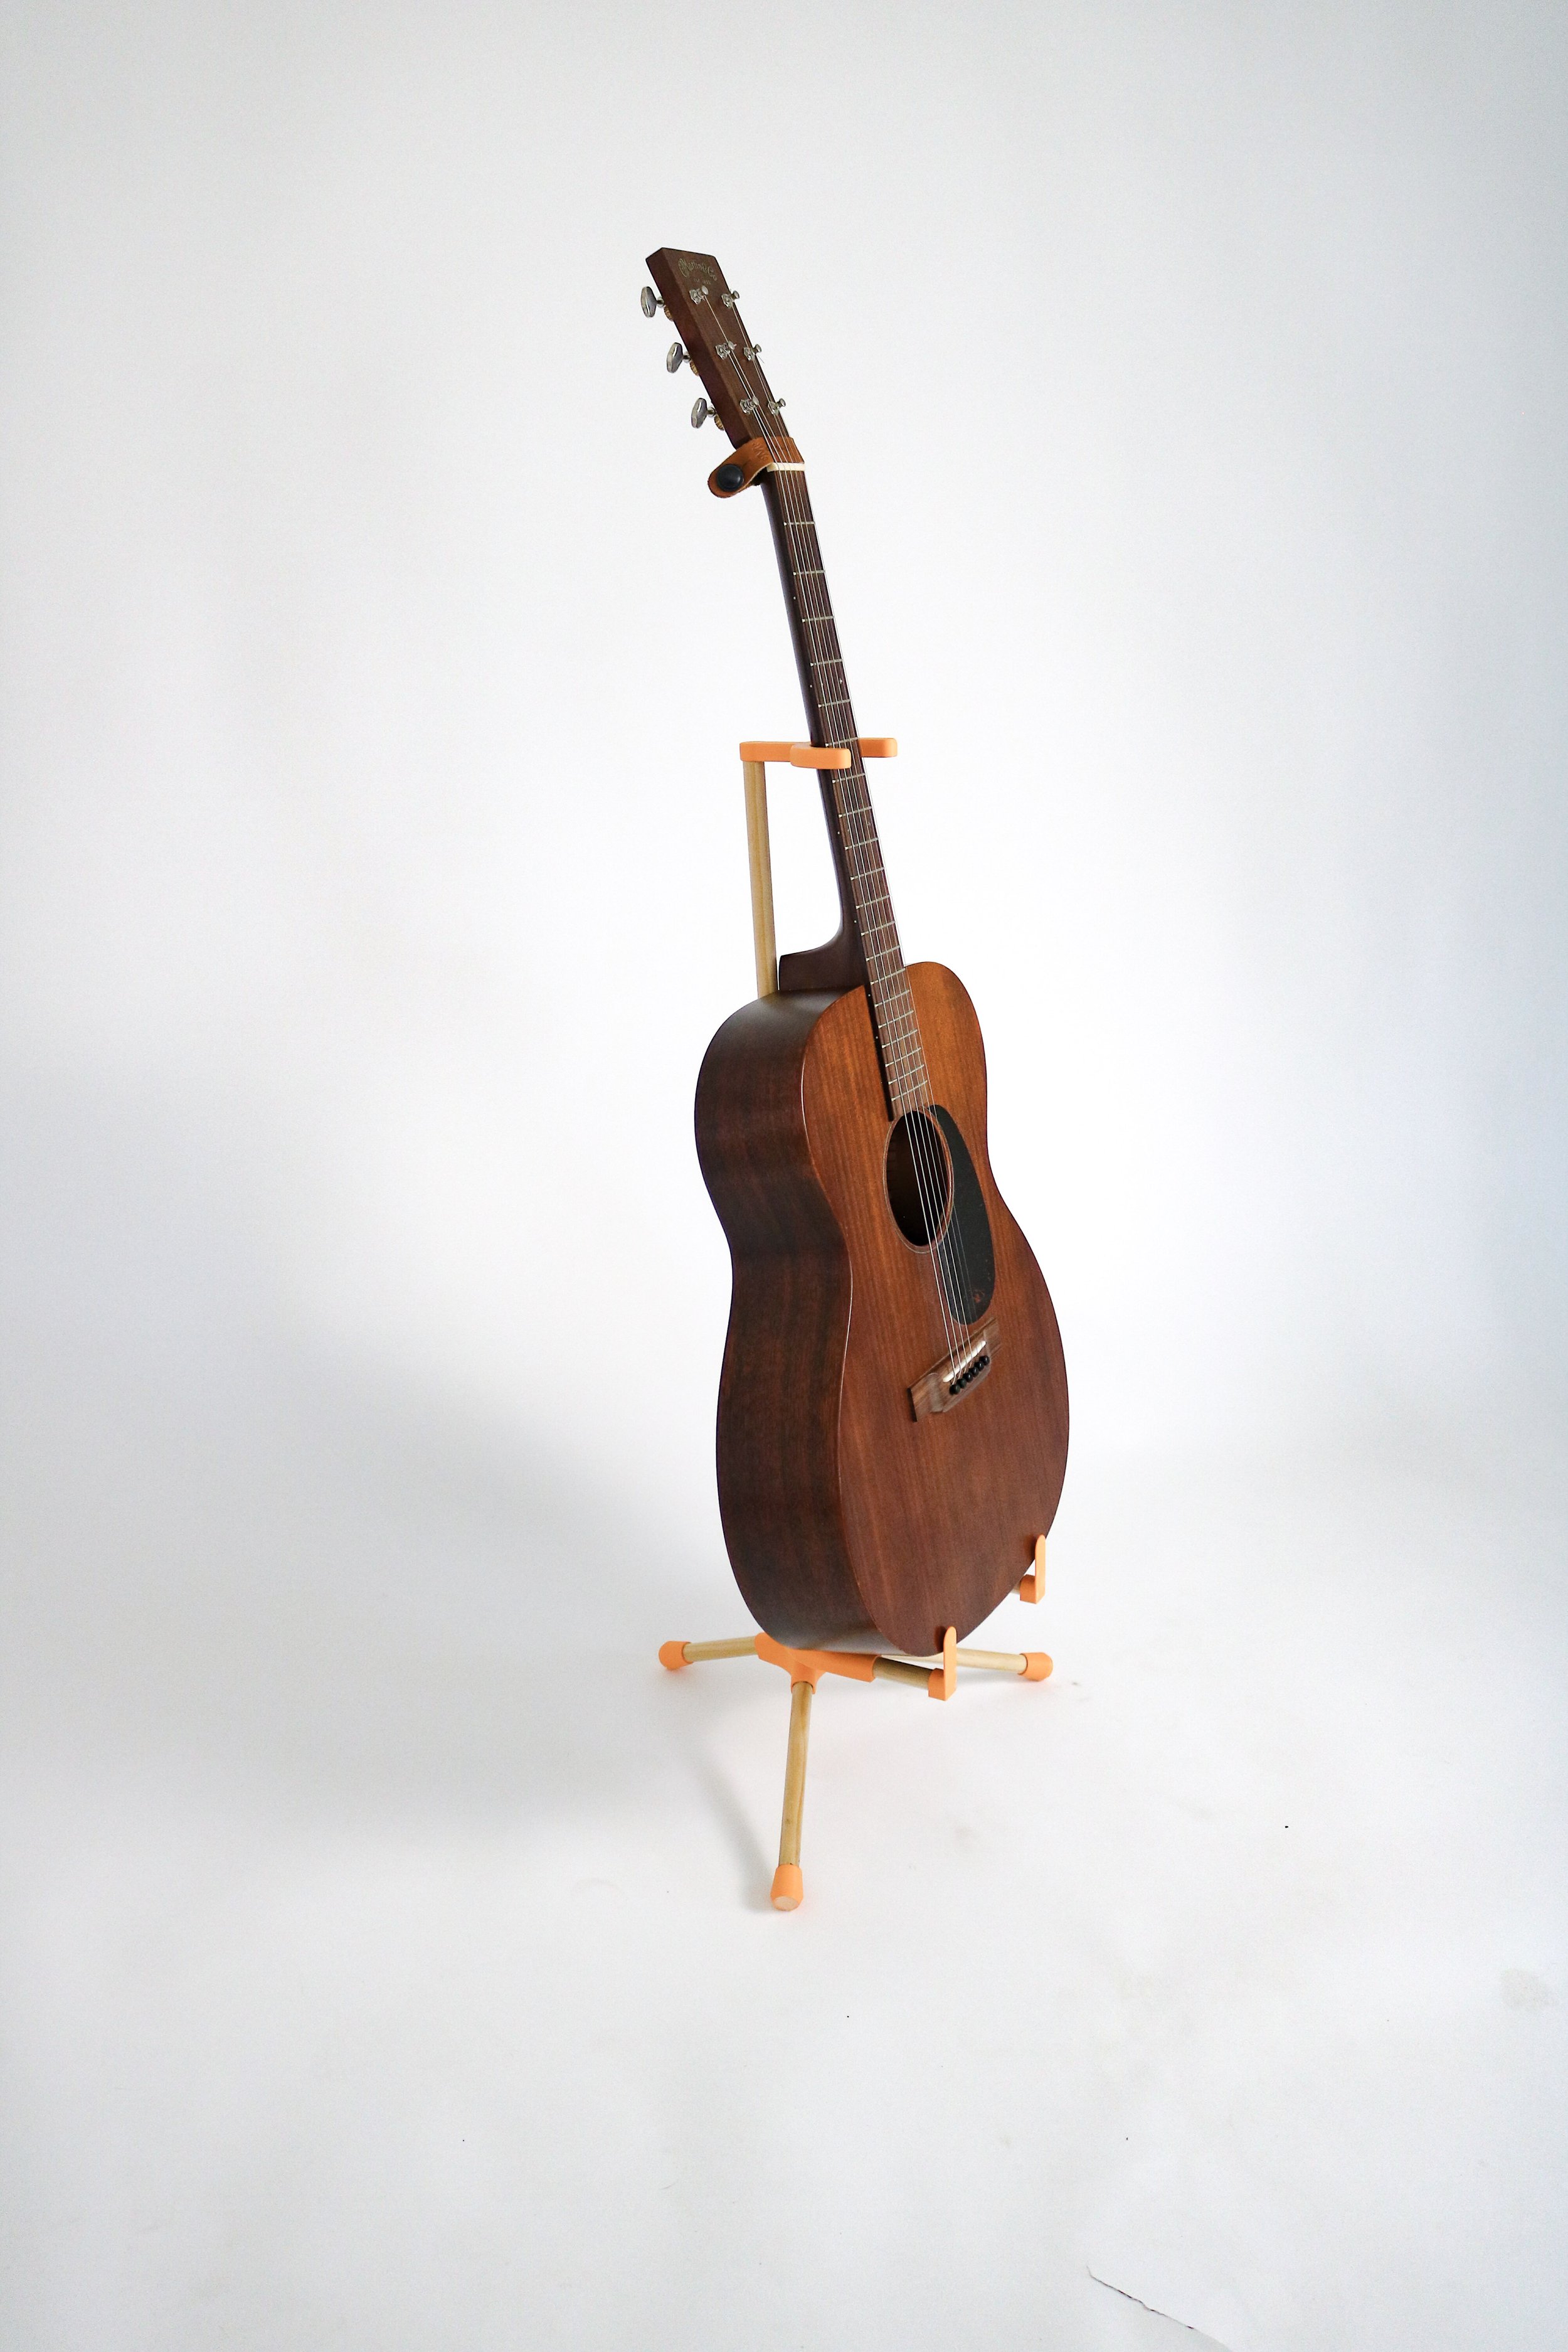
Guitar Stand
overview:
Originally this started as a project to mix woodworking and 3D printing. The idea being, if you could use 3D printing to make all the complex joints then you would only need simple wood working skills/tools to create a quality product. I made this an open source project in hopes of providing those with little workspace space and few tools a way to get into the maker space.
skills:
3D Modeling, Light Woodworking, Product Designing
material:
PLA plastic, Wood
challenges:
I set some challenges for myself here, keep the price close to a cheap guitar stand and use as few tools as possible. A bare bones version cost only $14.14. Adding wood stain and or paint would raise the cost. I was ok with this as it gave the builder some easy improvements if they would like to run with the project while still keeping it affordable for those who just wanted the stand. As for tools, all that’s needed is a drill, saw, and a screw driver. These are fairly common so I was satisfied with that. Some inherent design challenge were strength and shape. Strength, PLA is not very strong especially with the design I had in mind. Shape, FDM printers are horrible at printing tubes horizontally, which was required for this project. Changing the shape of the tubes to have rectangular bottoms allowed for better printing and better strength, the latter coming from the quality of the print and the added material on the tube walls.
improvements:
After a fair bit of use I have a few improvements I’d like to make to the model. The Guitar neck holder could be wider to support a larger variety of Guitars. I think the tube walls could be a bit thicker as they have a bit of flex in them. With a better printer I could get a tighter tolerance where the wood inserts (although round stock from general hardware stores tends to vary in accuracy which makes things harder). As for general improvements, the stand is very light which doesn’t inspire confidence especially with an expensive instrument. Maybe molding the parts out of epoxy but adding some weights in there could solve this problem. The wood has some flex to it which causes the stand to “bounce” a little when you set the guitar down. A harder species of lumber or metal round stock could be the answer but would most likely raise the price and be harder to work with for someone who is a novice.


Ch. 03: It’s About The Details
Although smaller, and a bit more straight forward I feel the following projects still encompass important skills and attributes that are advantageous to the design process.

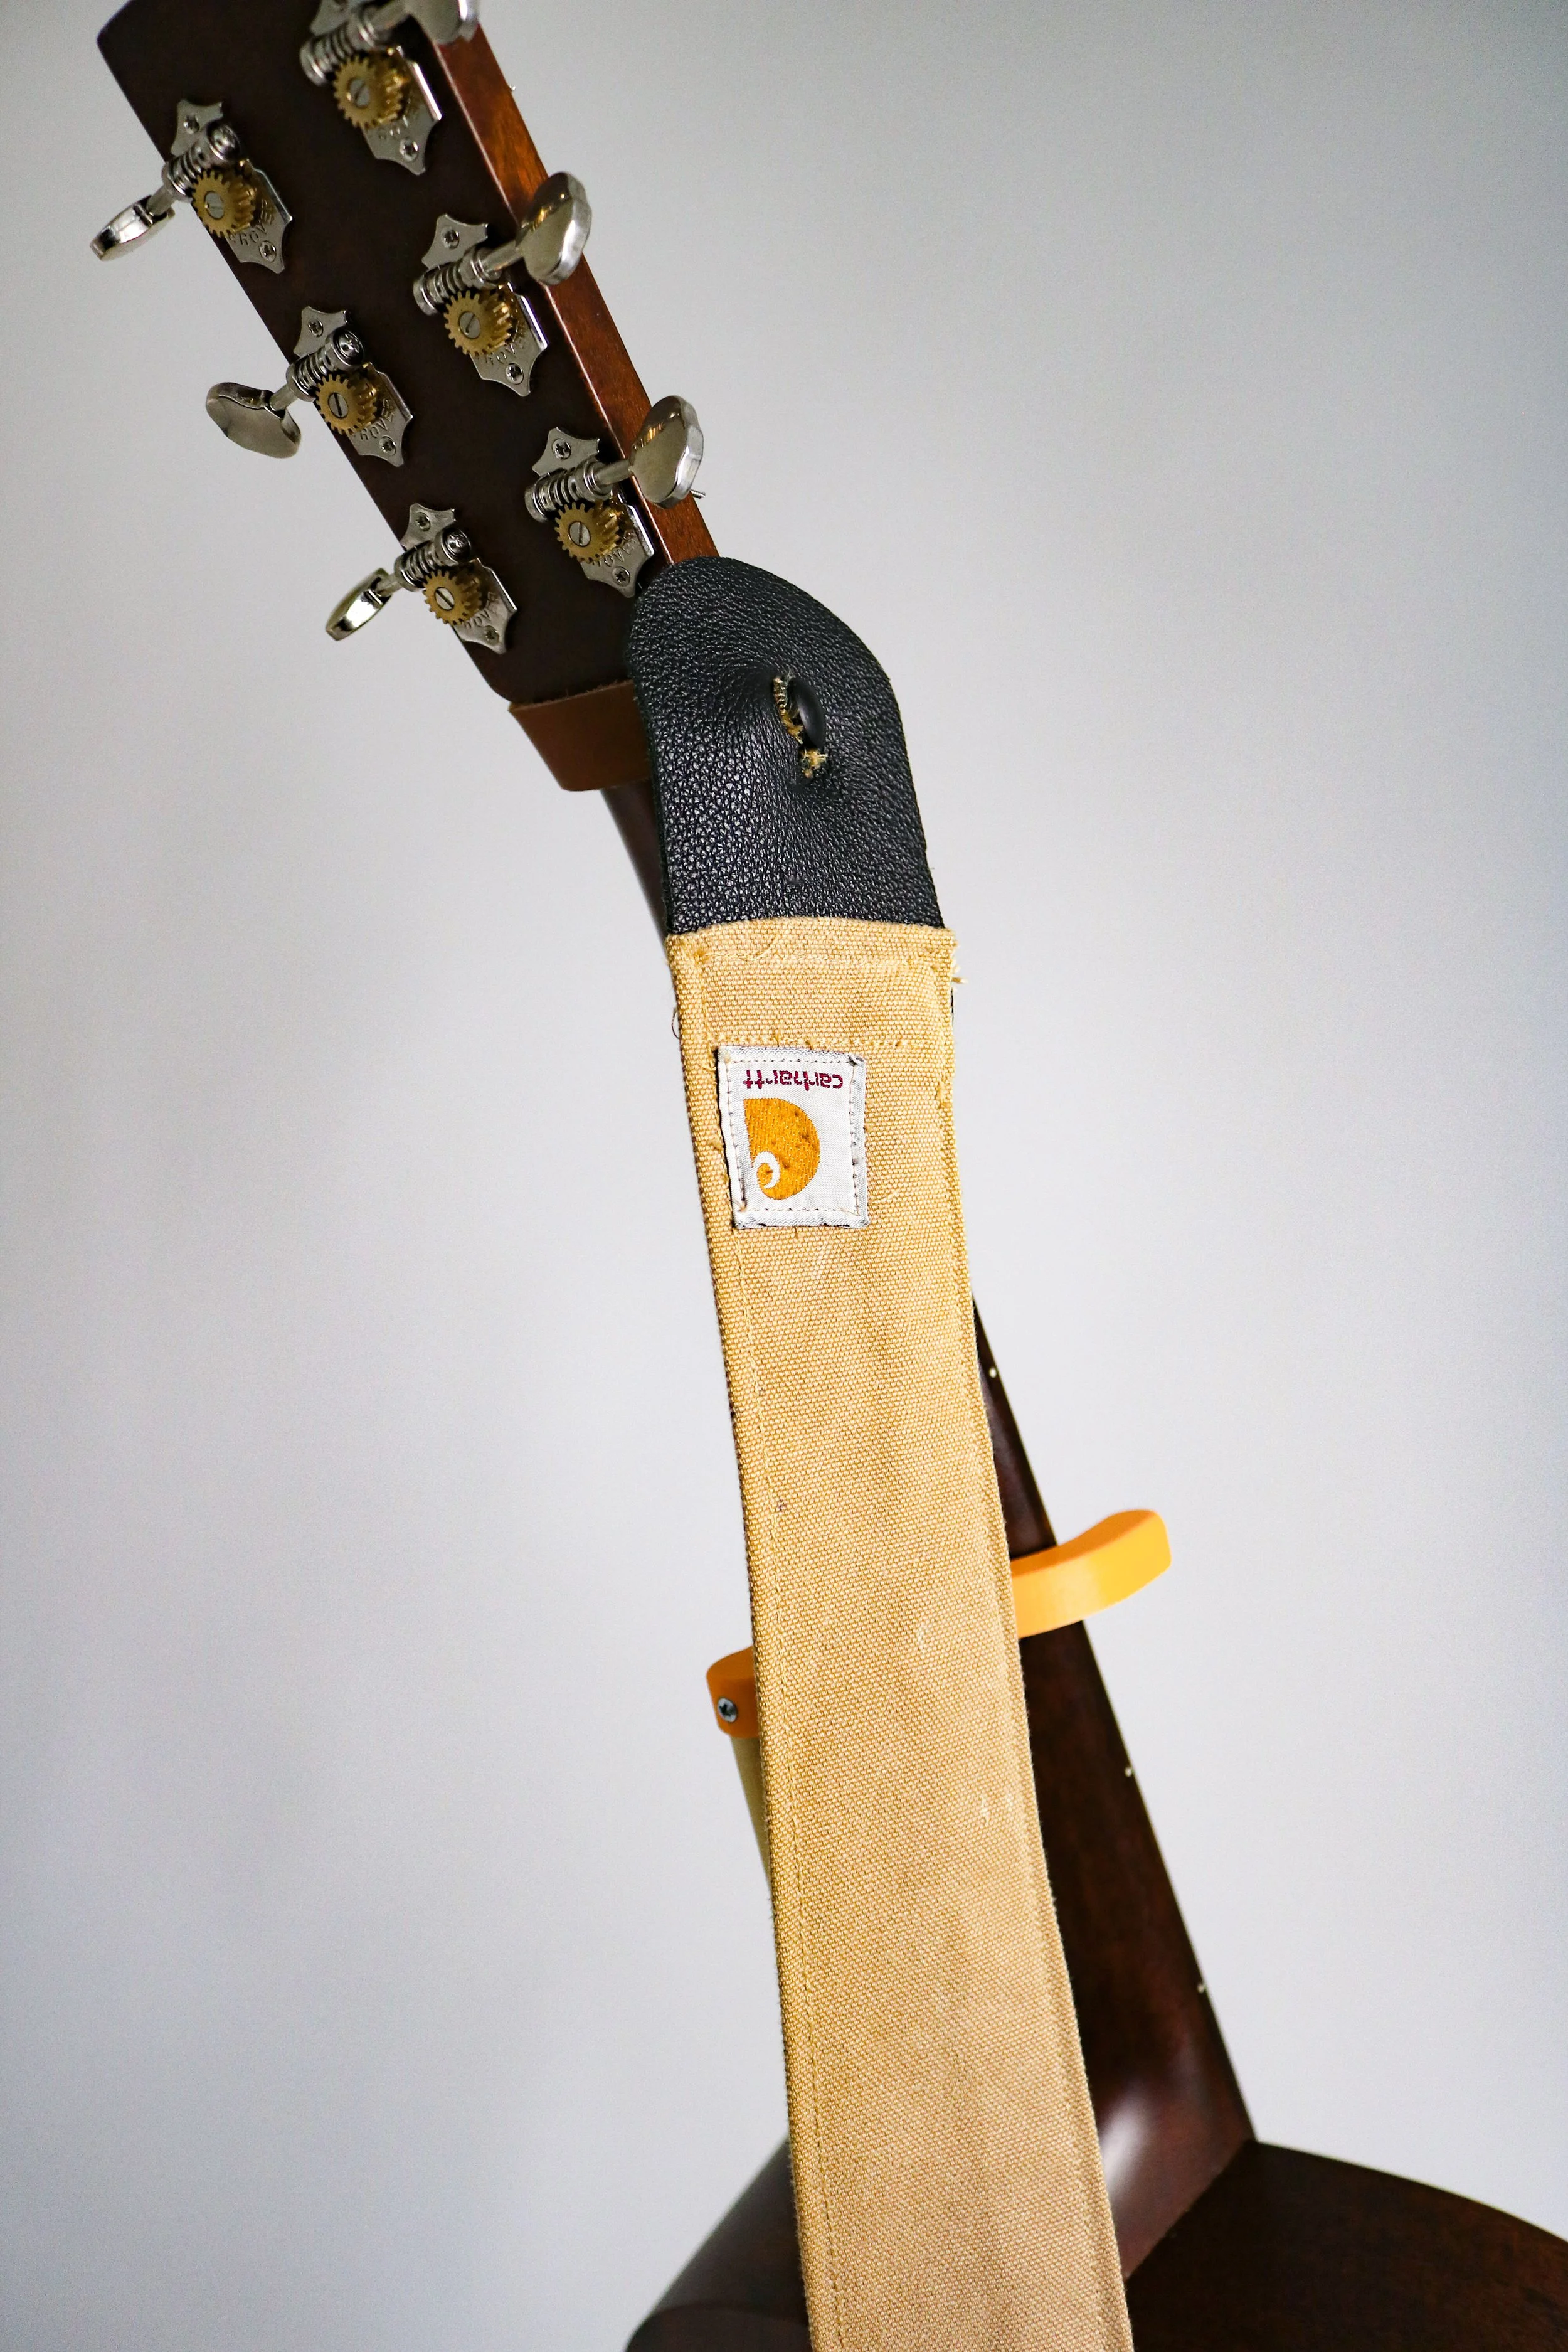
Carhartt Guitar Strap
overview:
Originally designed as a gift for my brother, this strap is made from old Carhartt Overalls my father wore while he was an iron worker. I 3D printed a Custom tri-glide to accommodate the specific width and thickness of this strap. I liked the finished product so much I made a second for myself.
skills:
3D Modeling, Sewing
material:
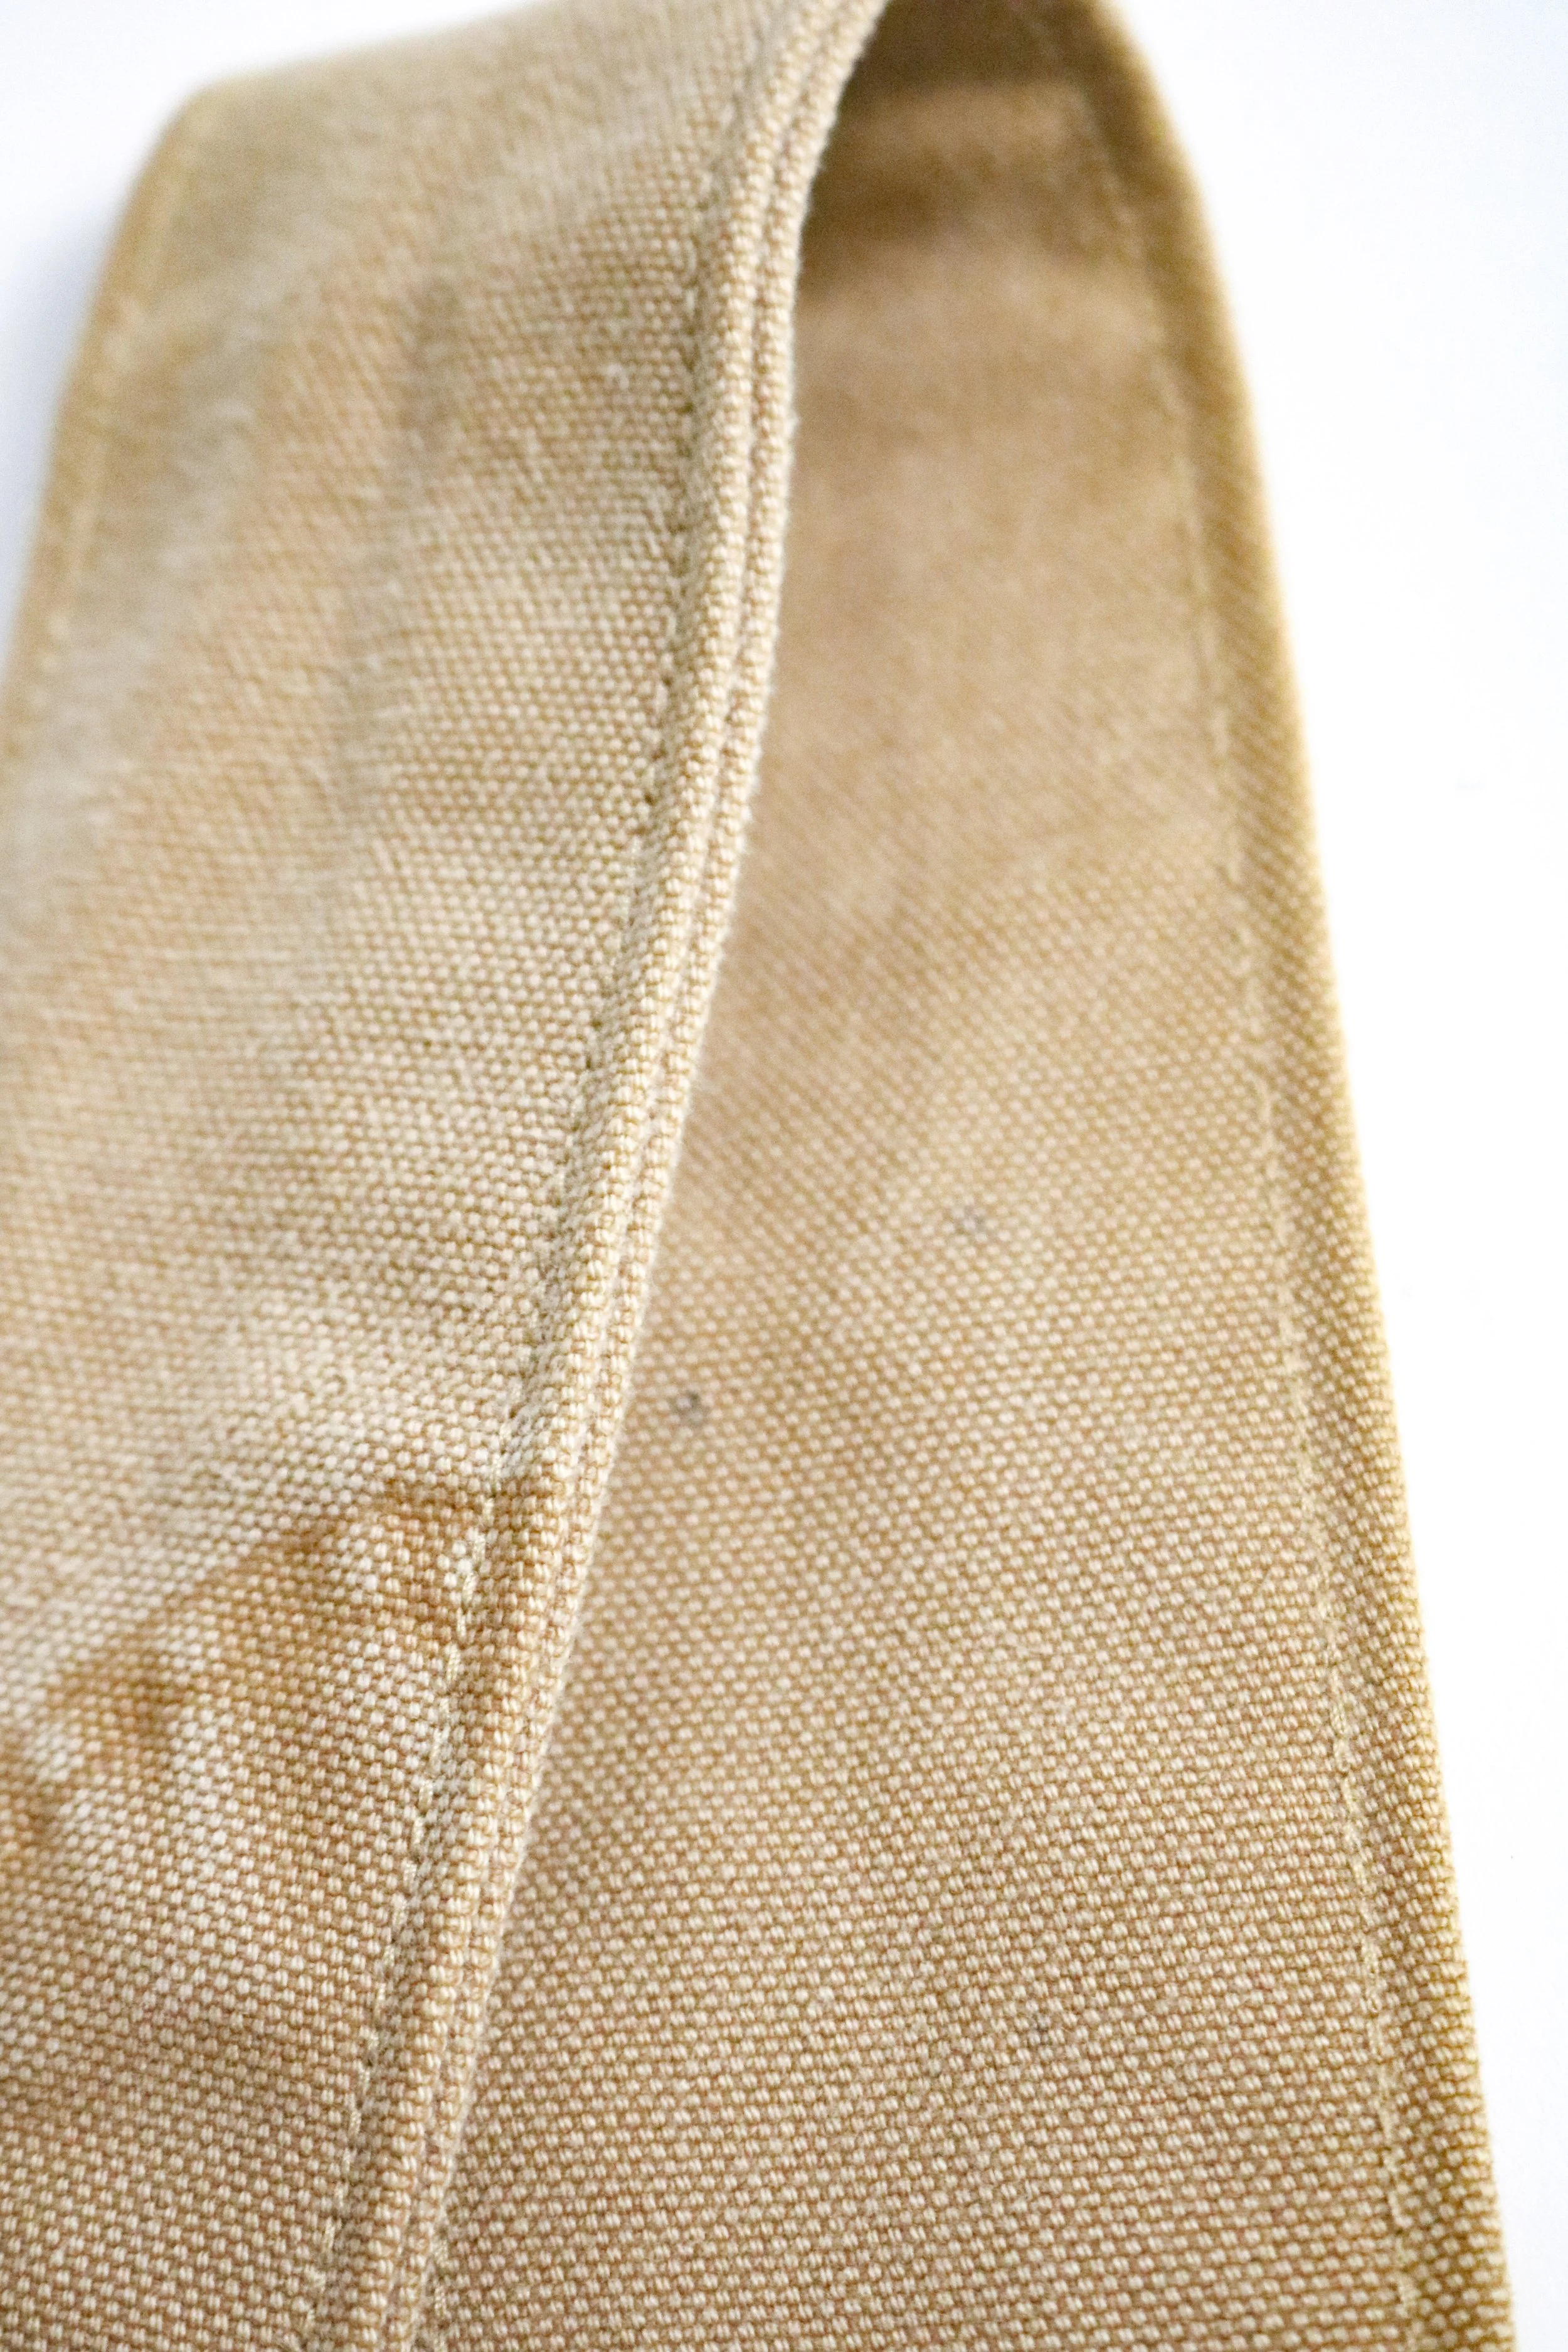
Carharrt Duck Fabric, PLA Plactic, Leather
challenges:
Besides “Home Ec.” classes in school this was my first time working with large pieces of fabric. I had never made a sewing pattern prior to this. Although straight forward, there was a bit of a learning curve. The fabric was very thick and I was attempting to double it on top of itself. In order to do this I had to purchase special sewing needles and ran the machine at a slower pace to ensure the needle didn’t break.
importance:
This projects displays two major design attributes for me, mediums and style. Working with multiple mediums is important in the design world and i’m well aware of that. I feel this project shows another facet of my skill in a mixed media sense. The way something looks feels and is trending is important. My brother is a song writer in Nashville TN. This strap isn’t merely meant to be a family memento but a stylish accessory that invites conversation when he’s playing writers rounds. For better or worse Carhartt is trending currently and this strap never fails to get a few comments. The worn material and strategically placed Carhartt patch help to make this piece visually appealing. Carhartt’s thick and durable duct material is also perfect for a guitar strap.


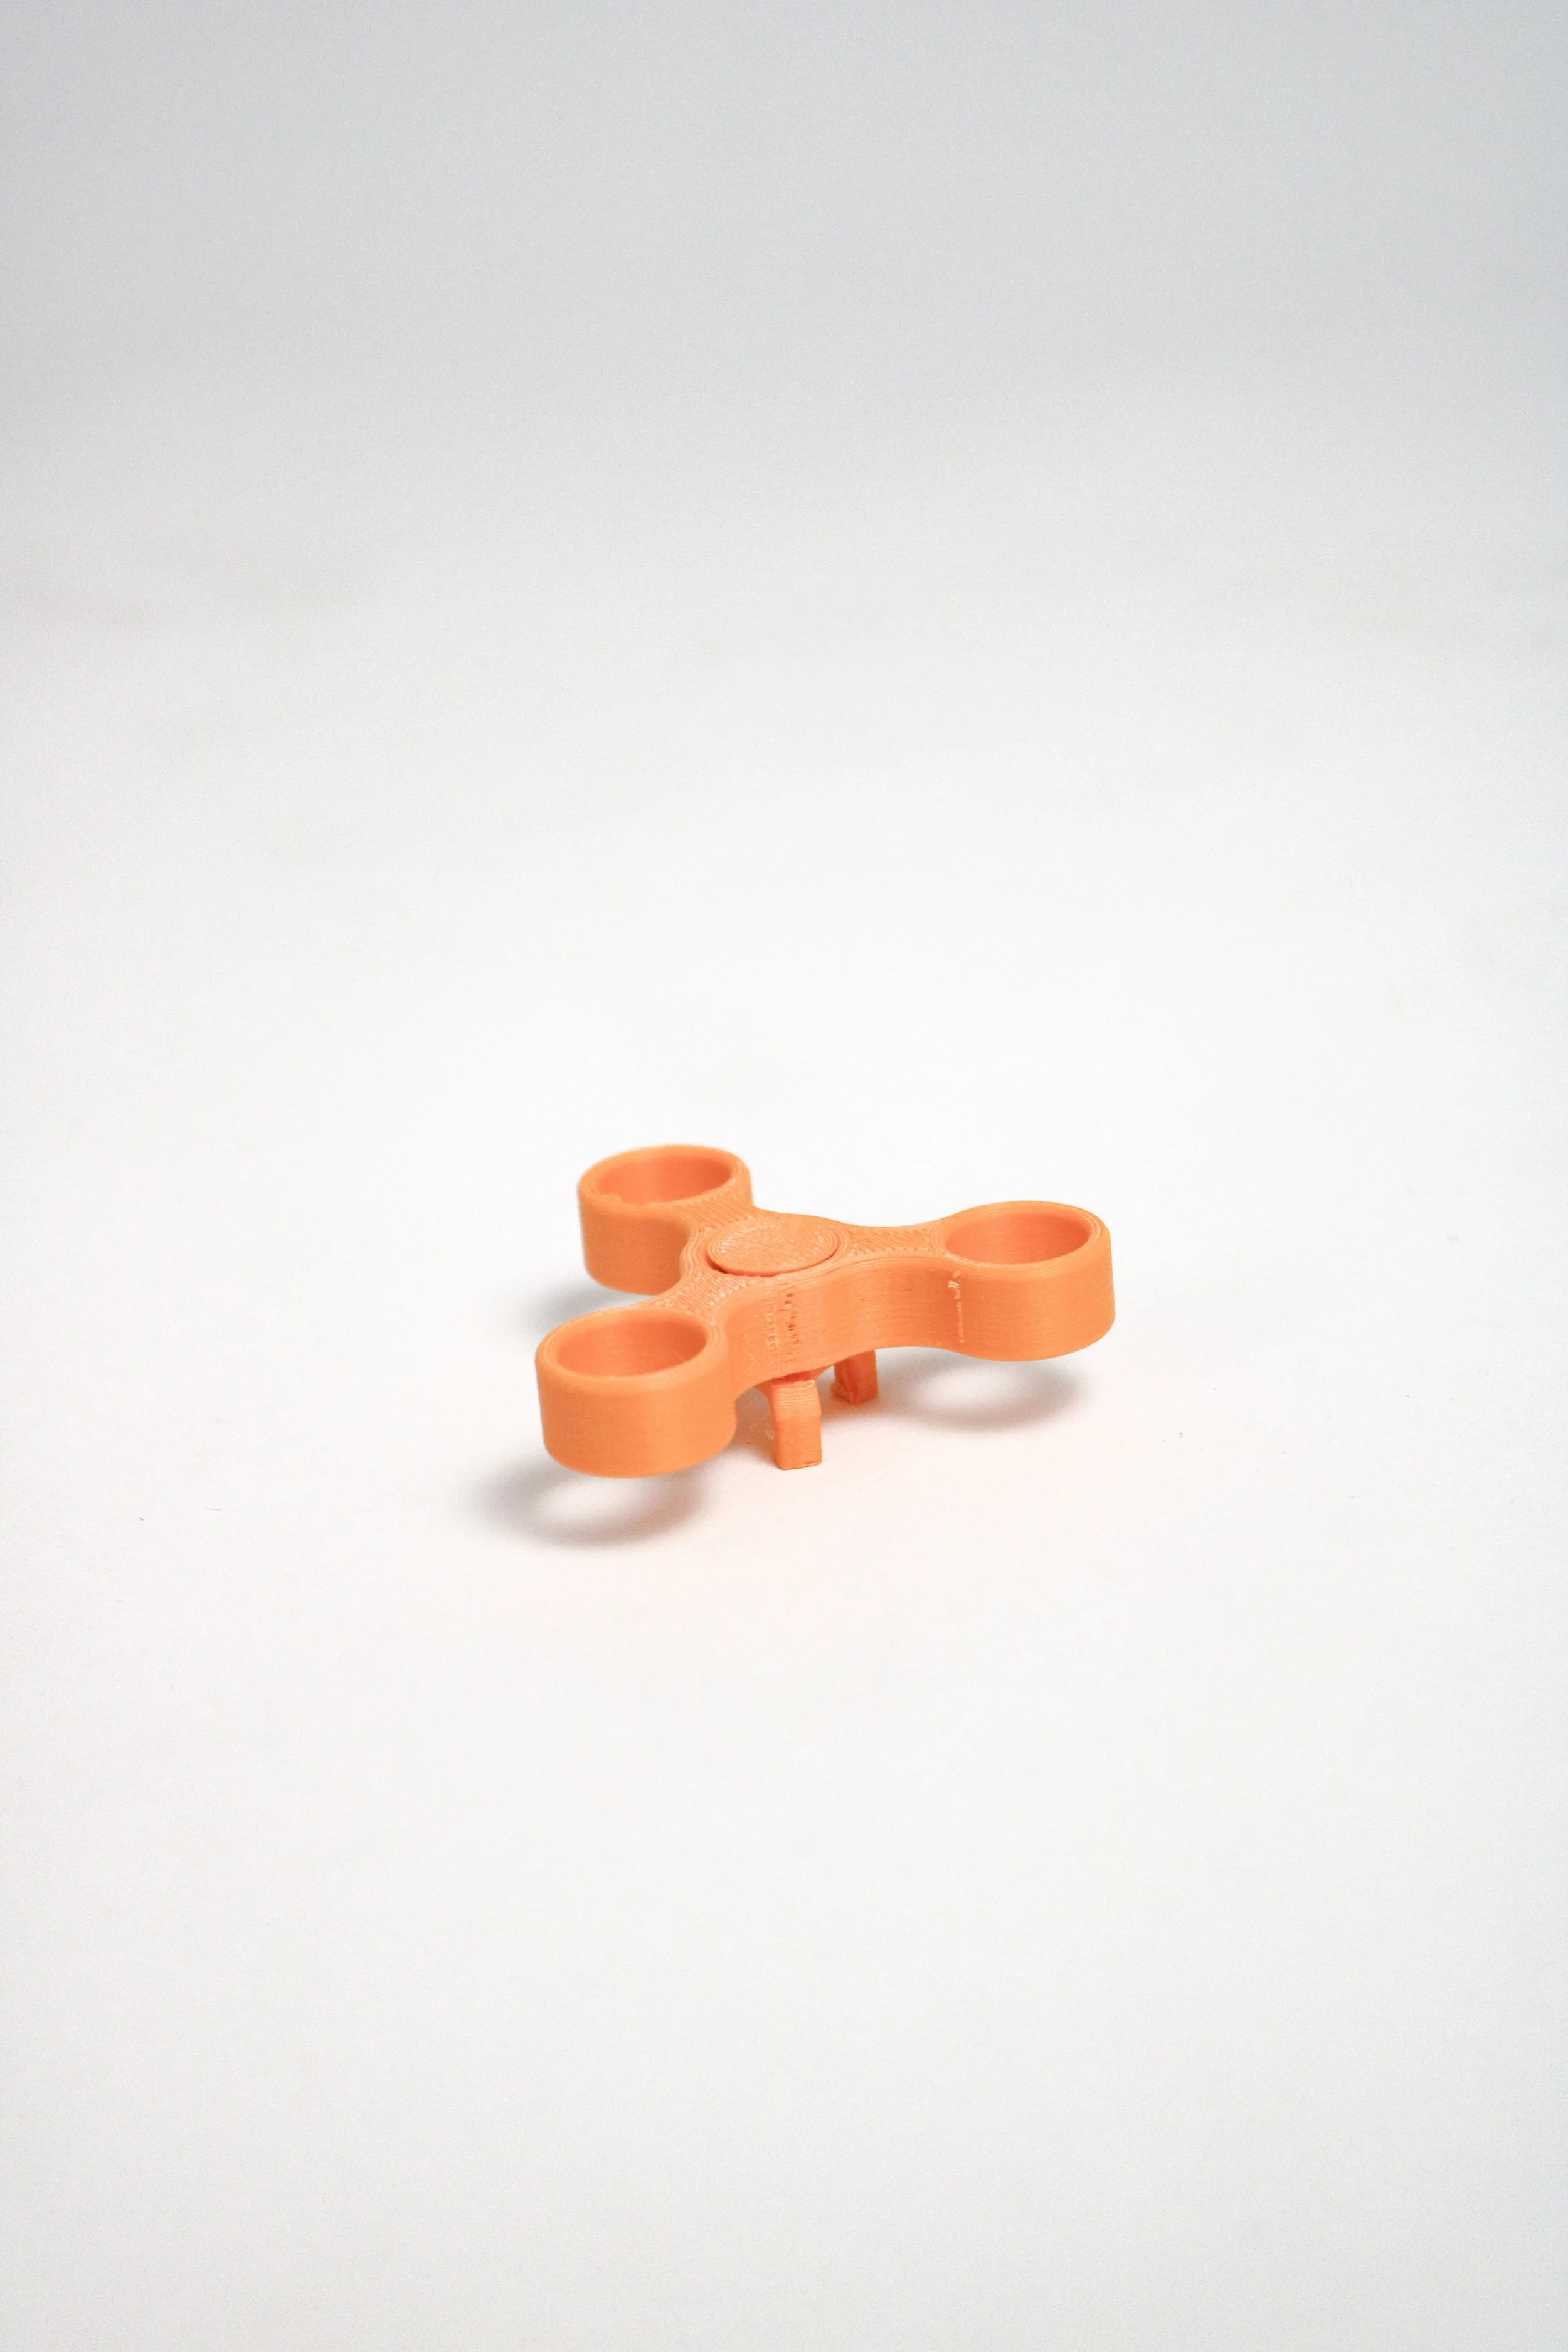
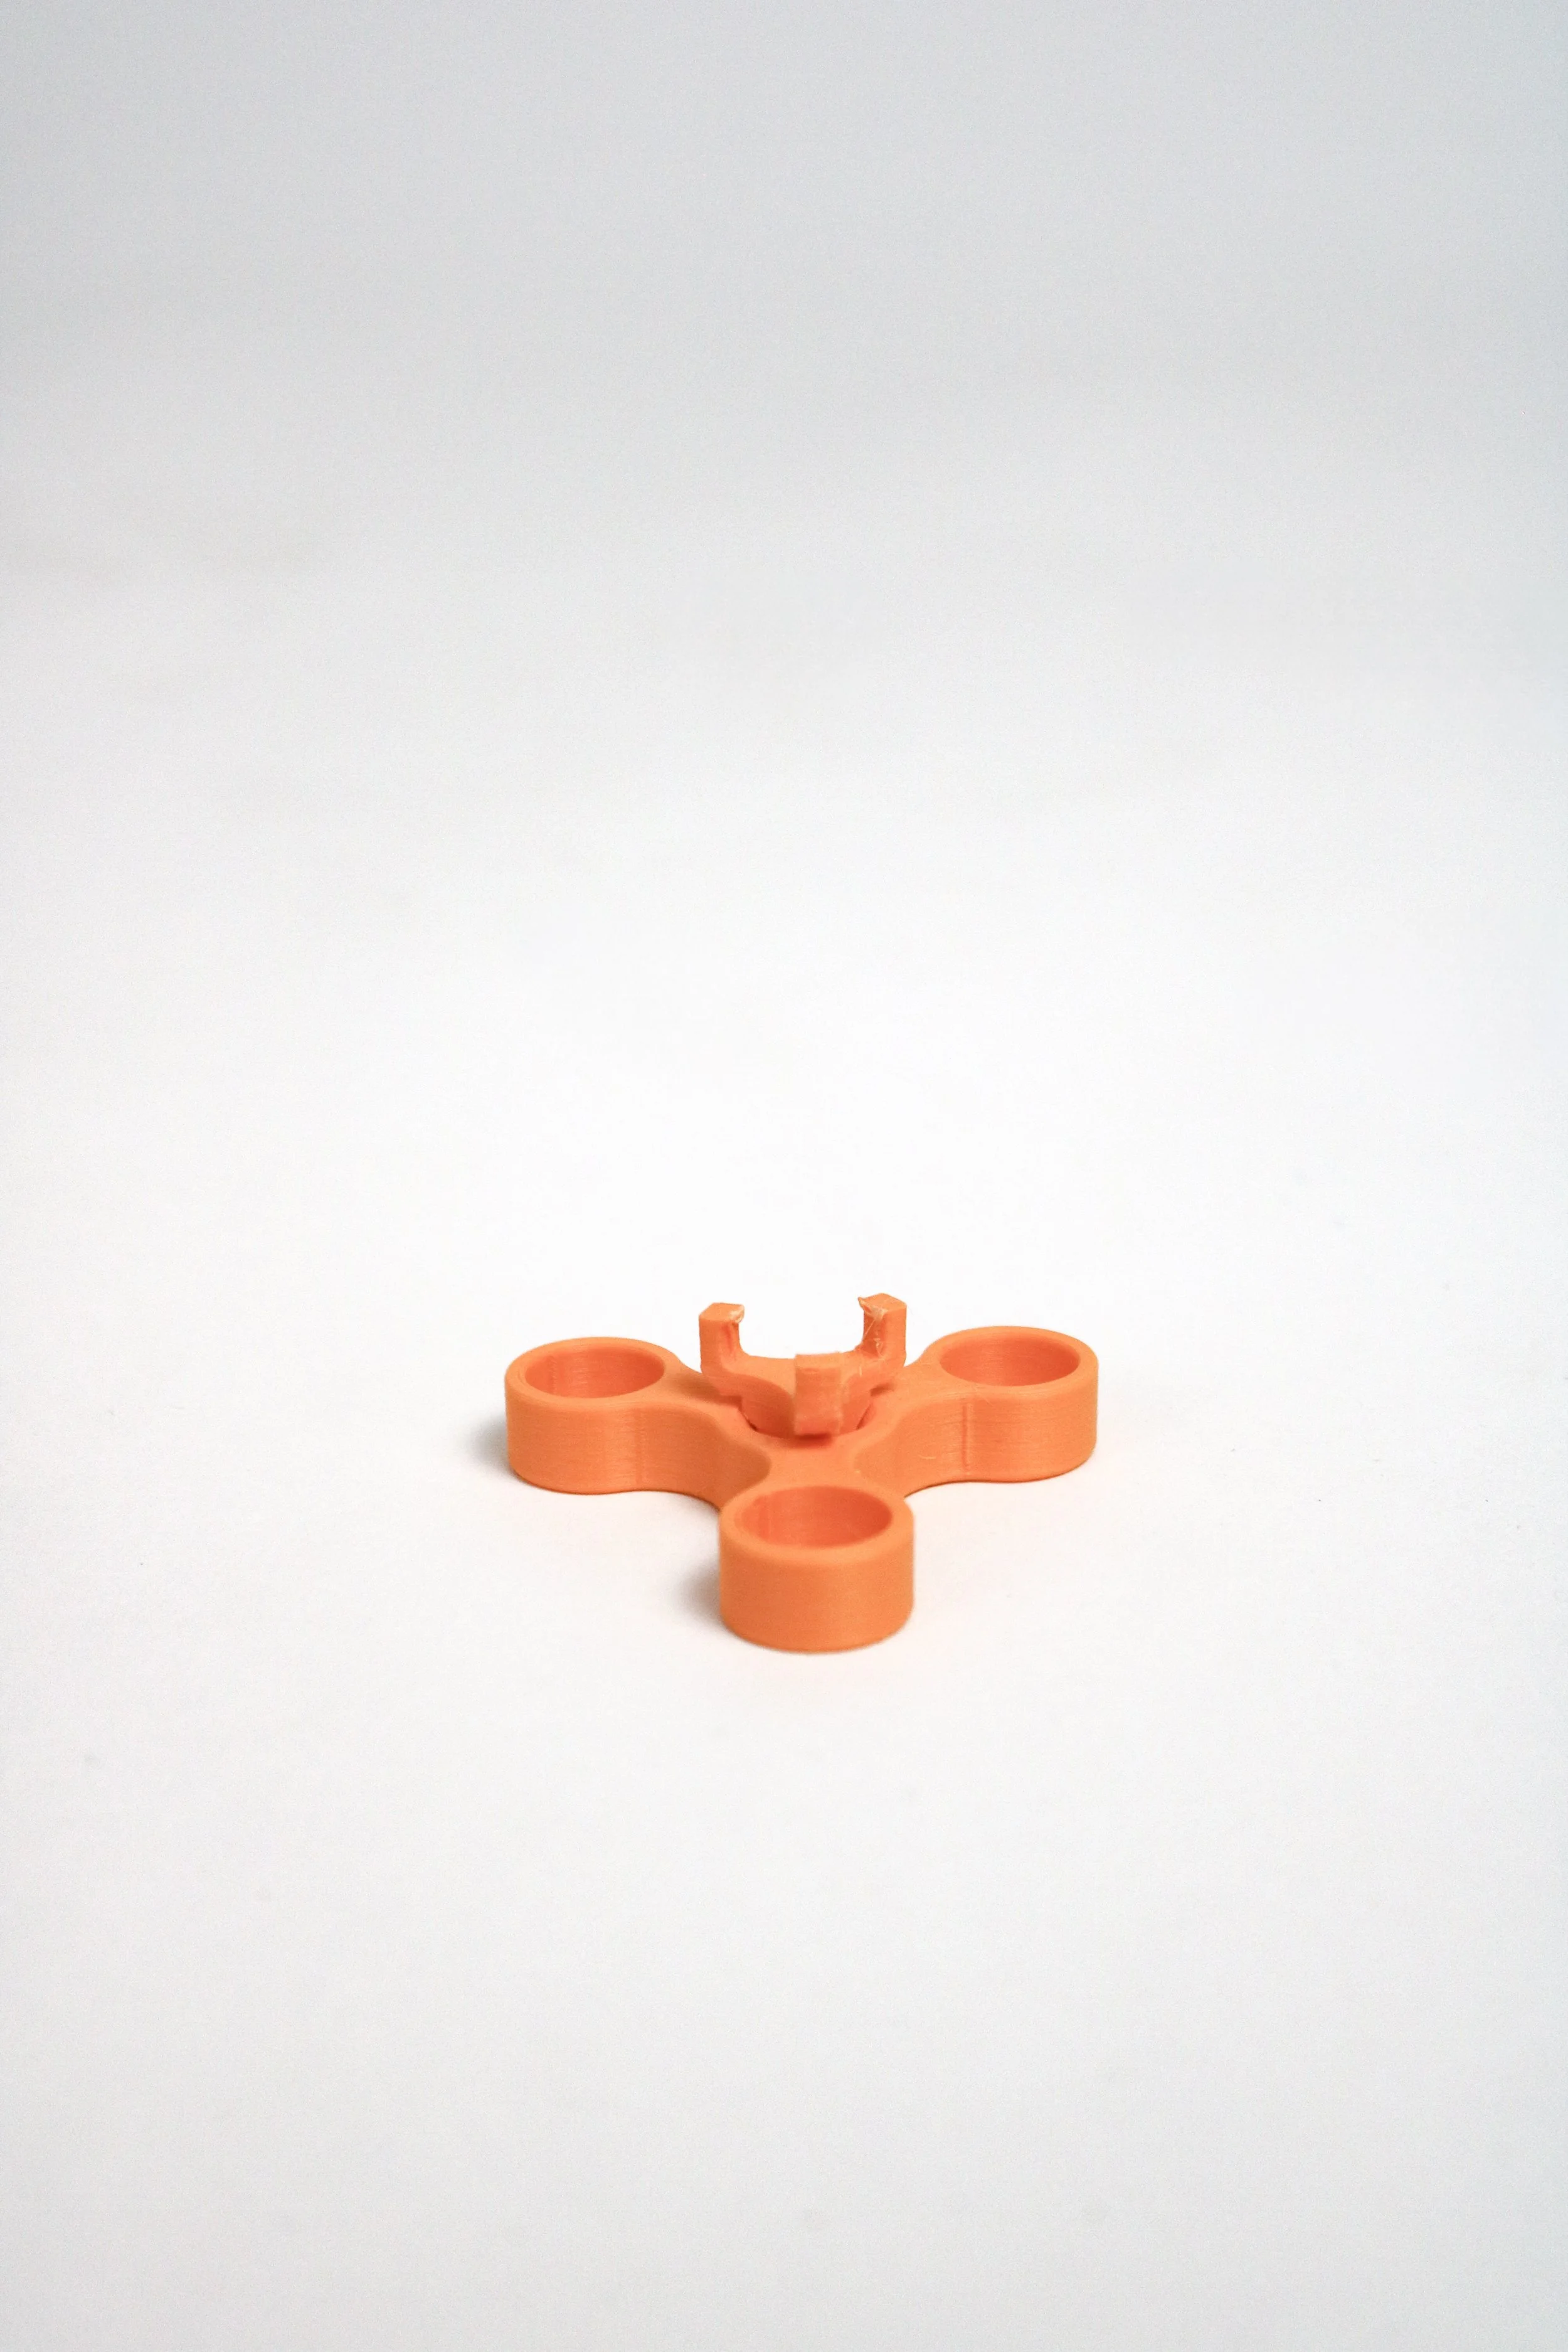
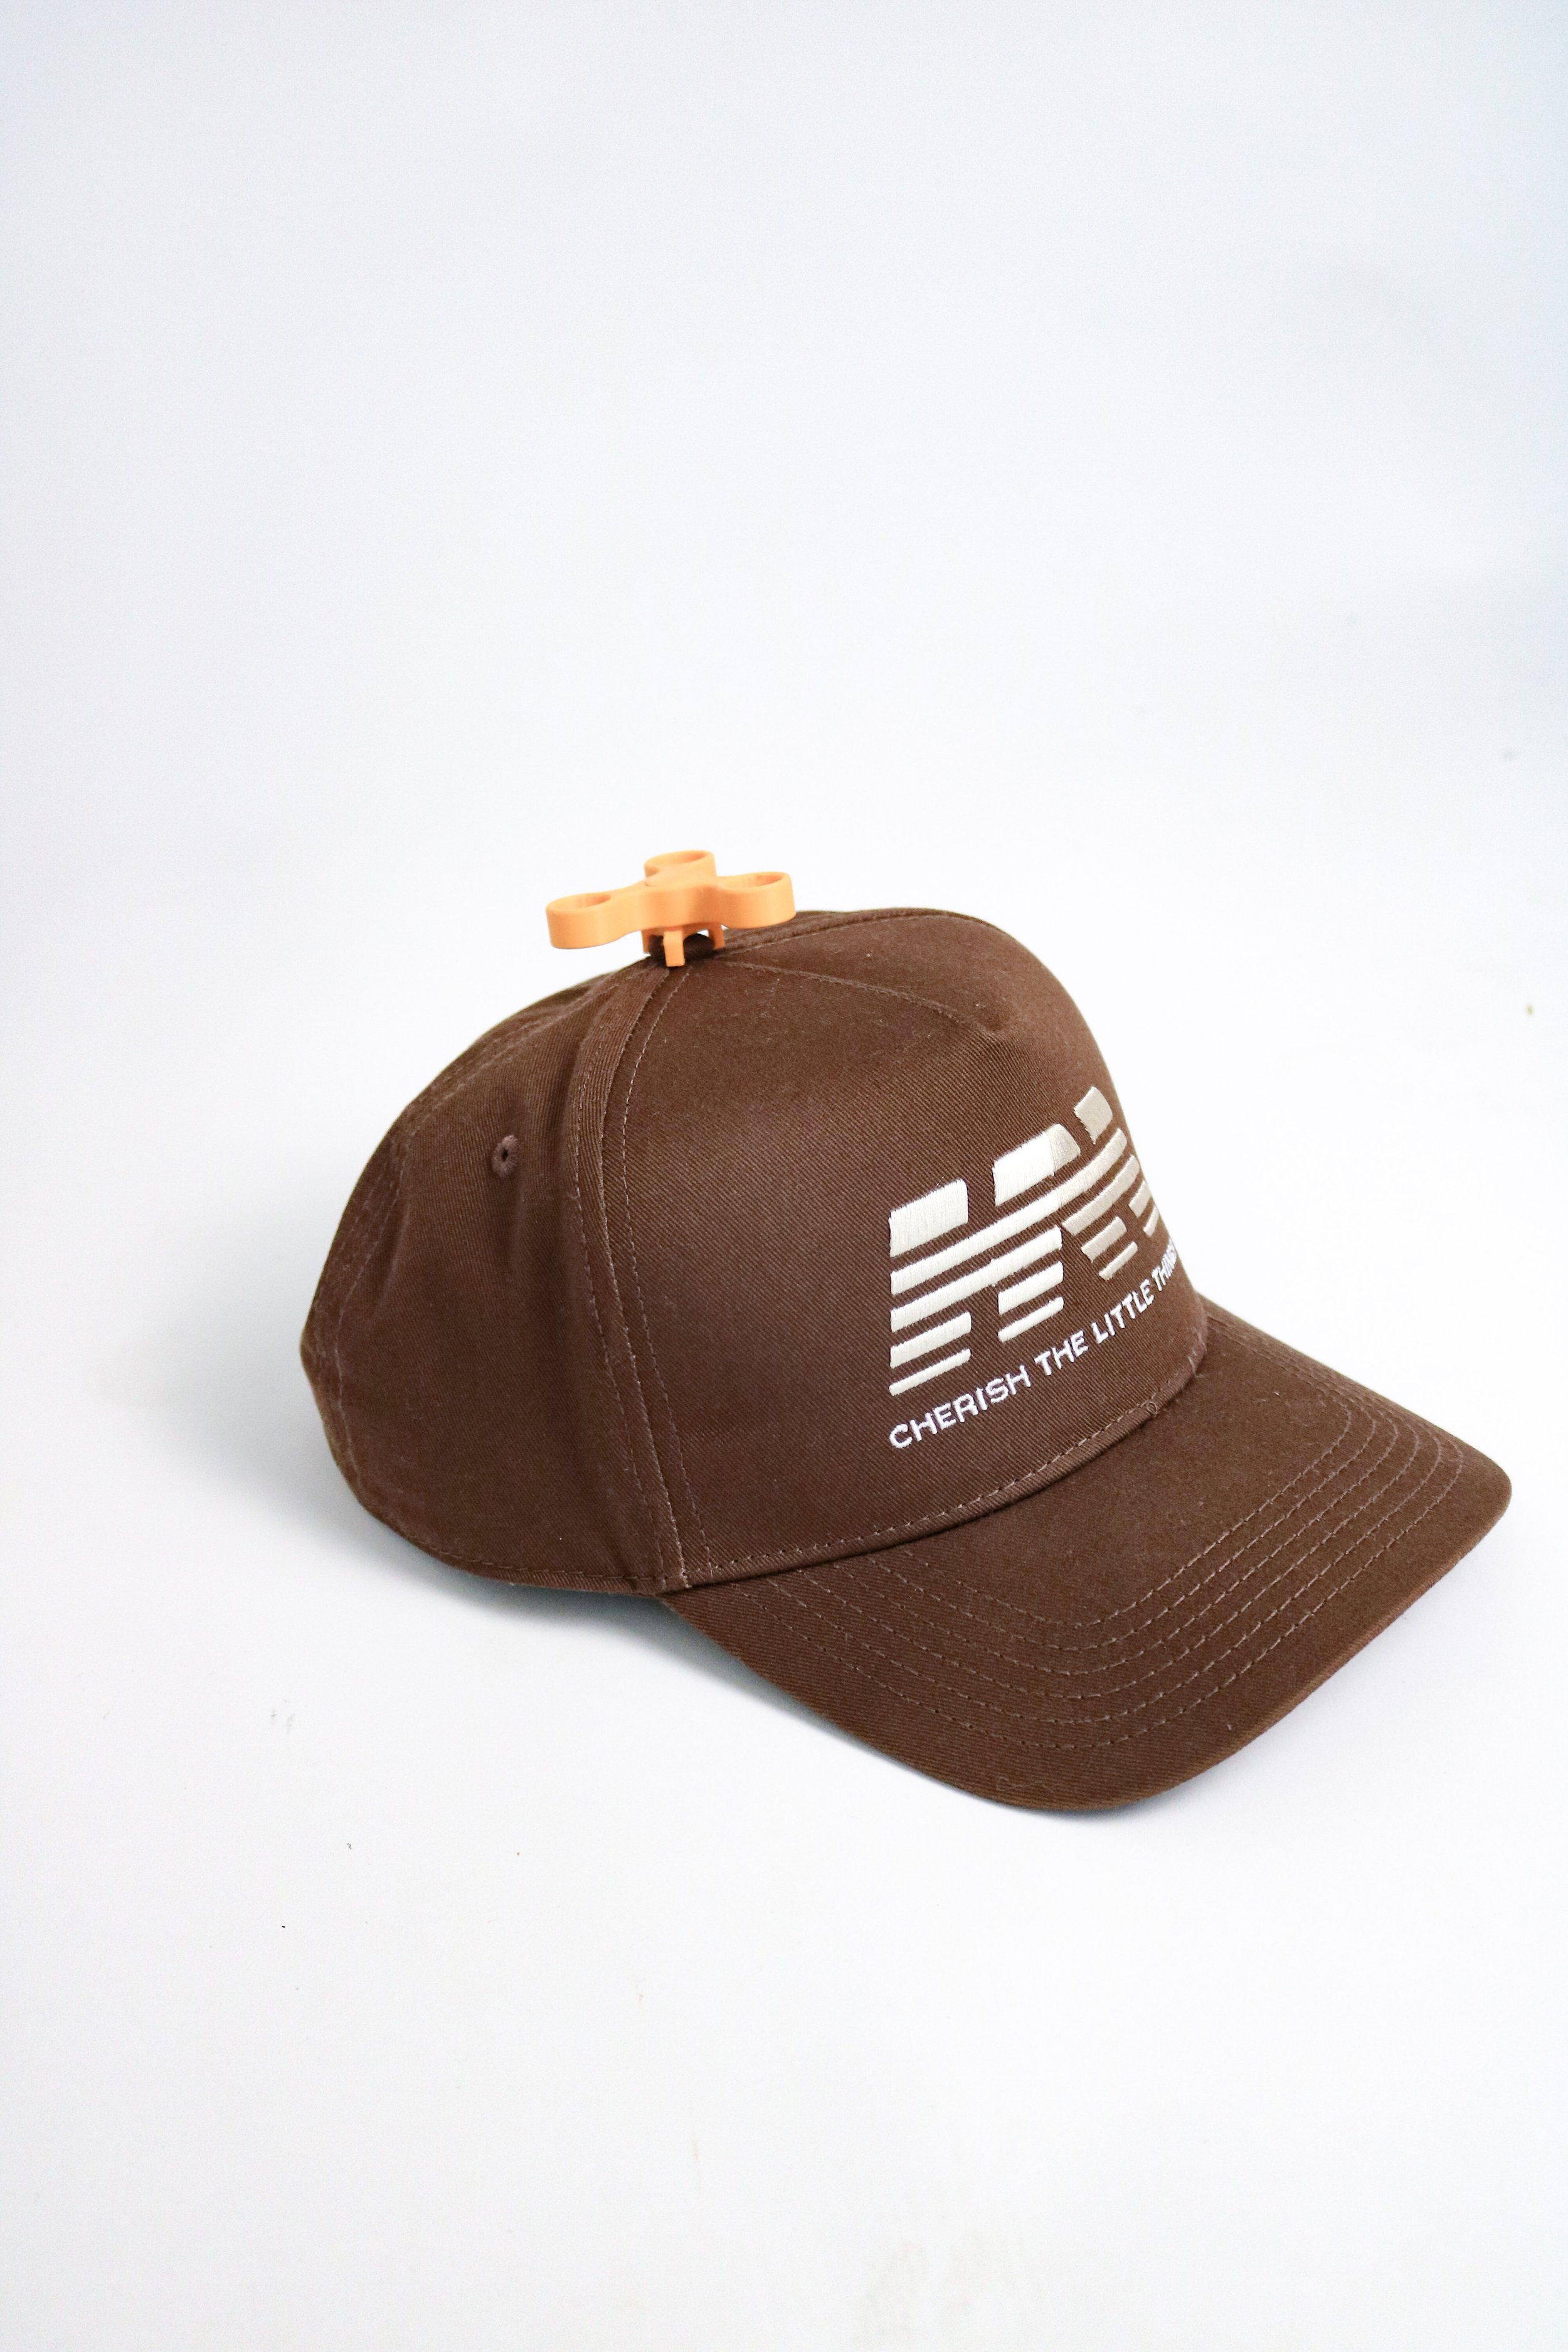
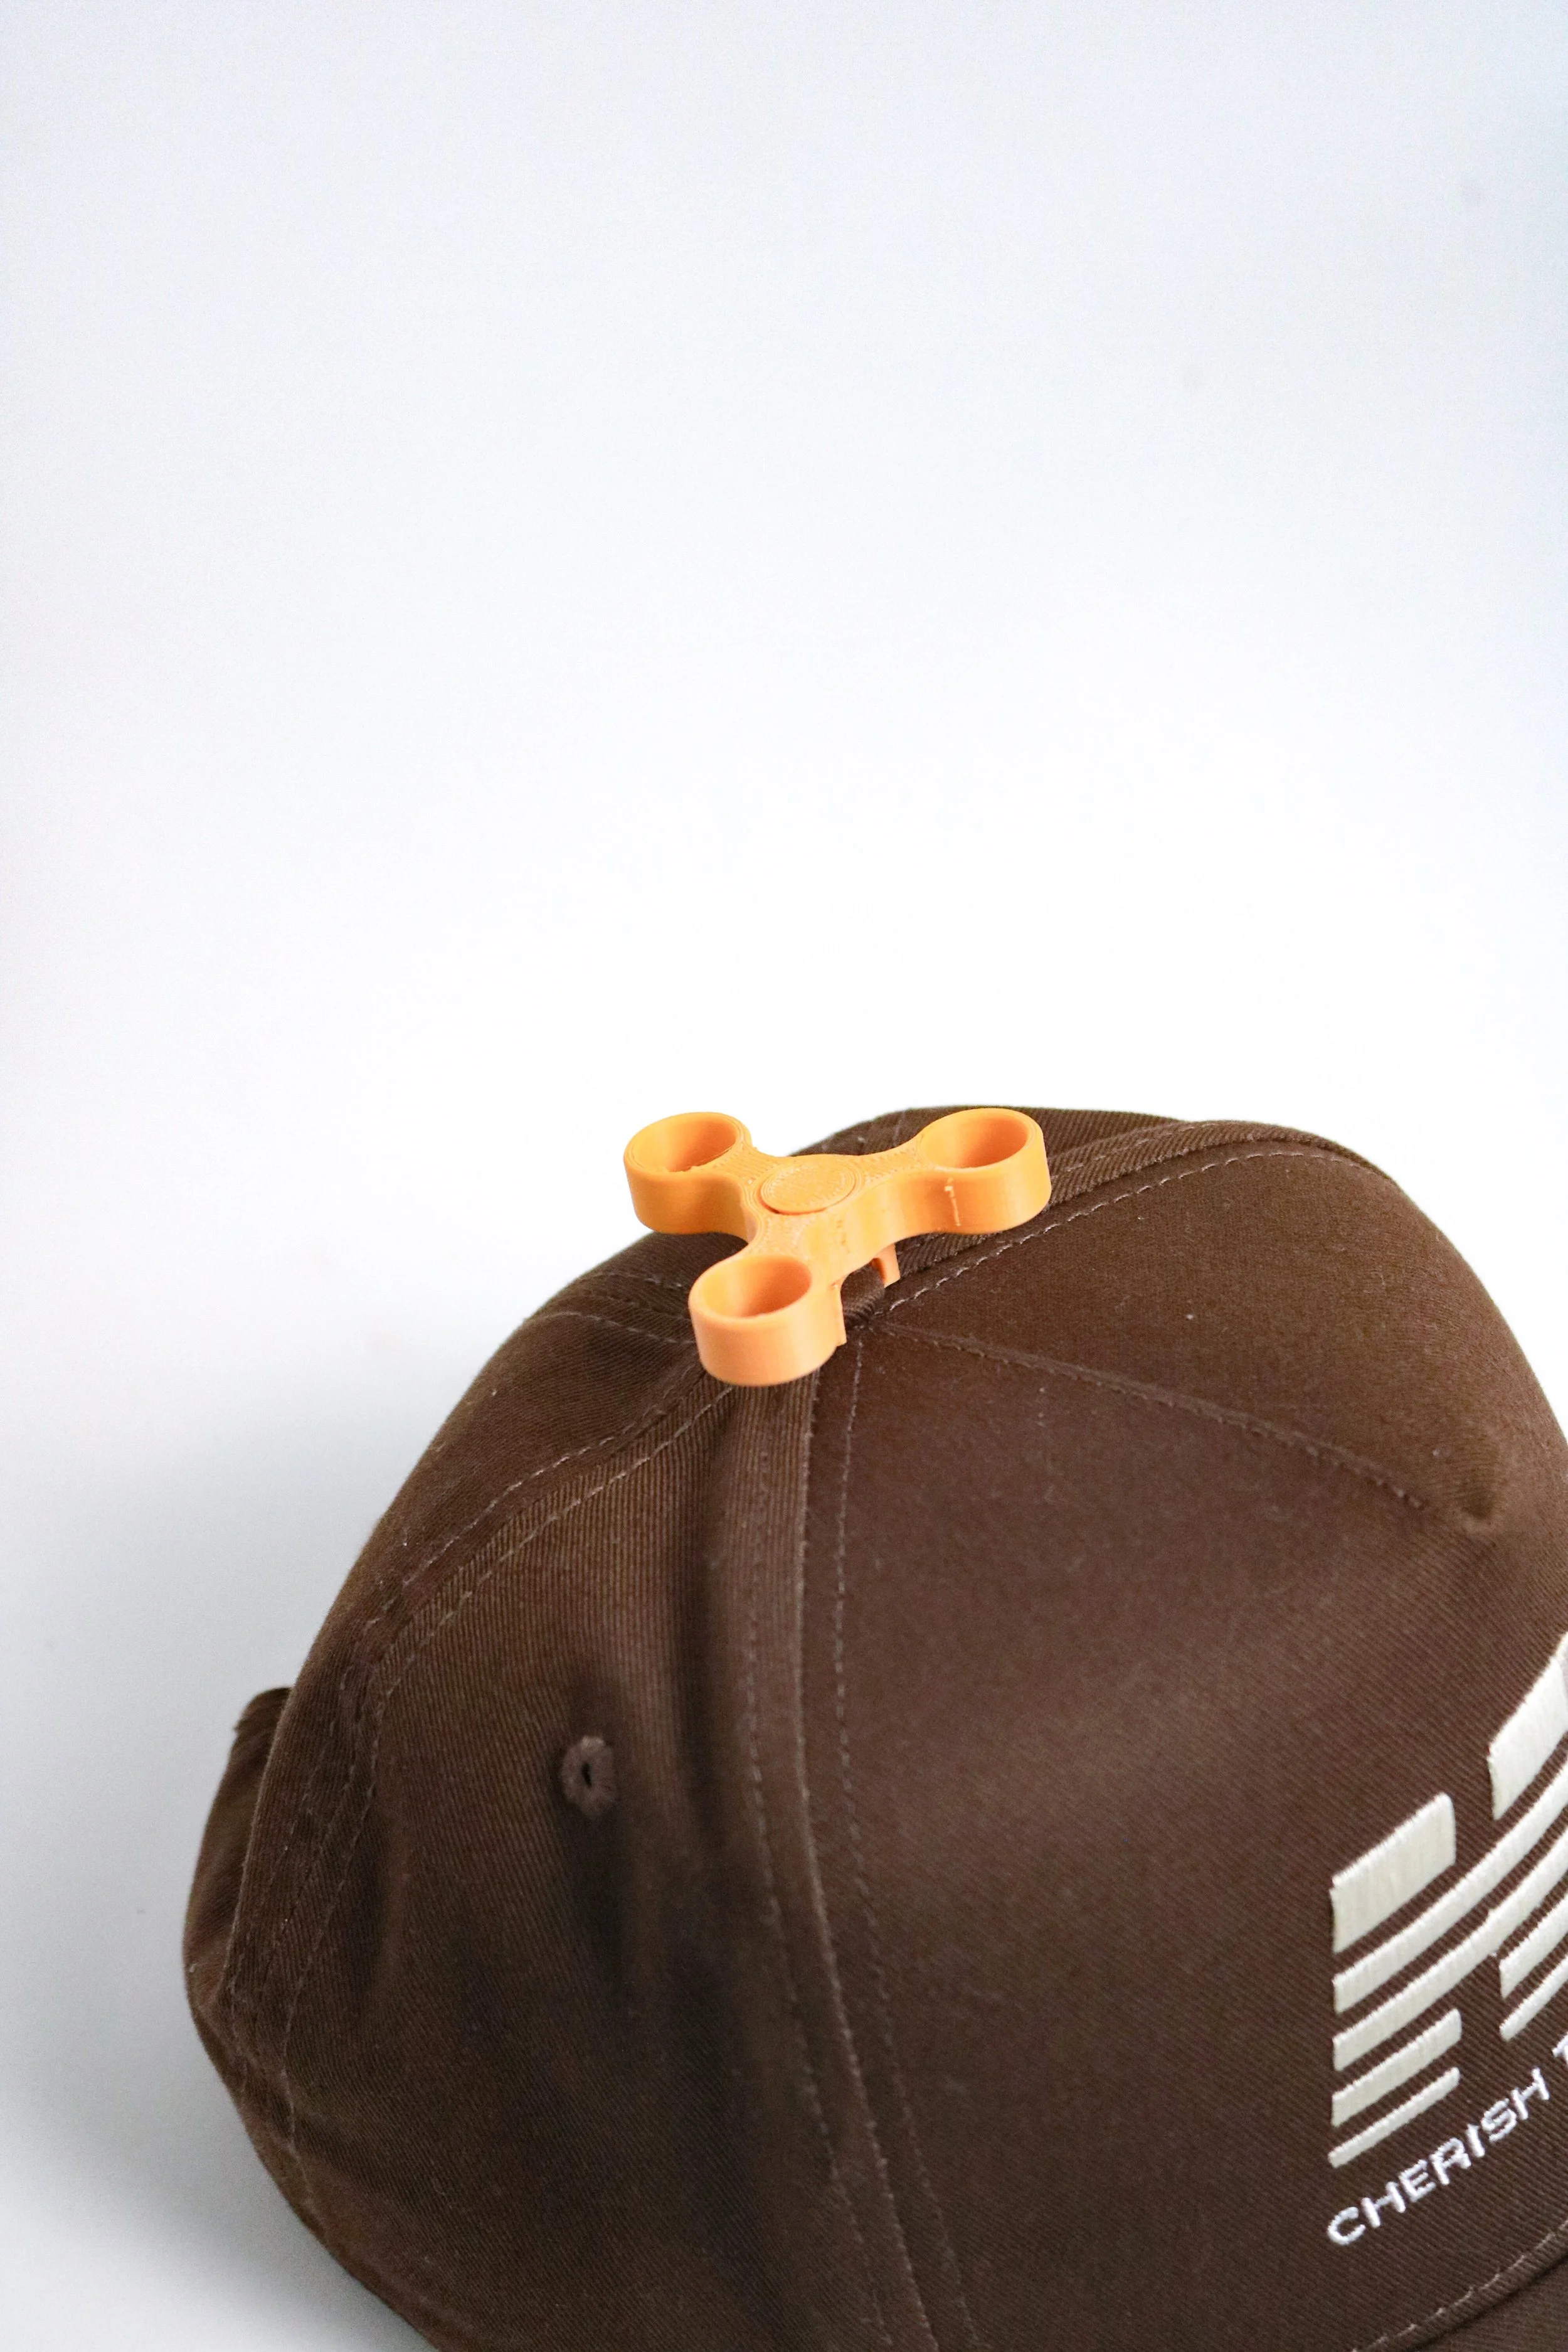
Hat Topper
overview:
Ive always wanted to make a propeller for the top of my hat as a gag and also as a way to experiment with print in place designs. At the last minute I decided to go with a fidget spinner instead of propellors for comedic value.
skills:
3D Modeling
material:
PLA plastic
challenges:
Honestly I was most challenged by the printer and material strength here. Coming up with a sleek design to stop this from being super bulky proved to be difficult as the little claw arms kept breaking off when attaching or detaching from the hat. I eventual found a good thickness that provided a snug grip without putting too much pressure on the arms.
importance:
Admittedly this is a very silly project and I debated not including it. Eventually I gave in though, because I believe this project shows off a really cool concept, print in place designs. This is a special technique mostly used in additive manufacturing that allows for designs to contain two separate parts to be built simultaneously while interlocked (usually with tighter tolerances). The end result is a print that, when finished, has some sort of motion to it as soon as you take it off the printing bed. What does this have to do with me? This isn’t a common way to design things when it comes to traditional metal and wood working. Usually you create two separate pieces and interlock them later on to achieve motion. Along with normal design techniques I have worked with alternative forms of manufacturing that have lead to a unique perspective when designing a product from the ground up. These new advancements in manufacturing fascinate me and I hope to never stop exploring them.